

Are you a serial souvenir collector? Always gotta grab something from the gift shop to remember your trip?
What if I told you there’s a better way to remember that vacation than shelling out money at souvenir stands? This trip, say no to souvenirs and take a more active (and fun) approach to capturing memories: photography.
Here we’ve put together a collection of our favorite travel photos, complete with how-to instructions for capturing a similar shot of your own. Whether you’re city-, beach-, or outdoor adventure-bound… we’ve got a photo idea for you. You DON’T have to be an expert photographer, either. Almost all of these shots are beginner-friendly.
So grab your camera and put on your best face for your very own vacation portrait shoot!
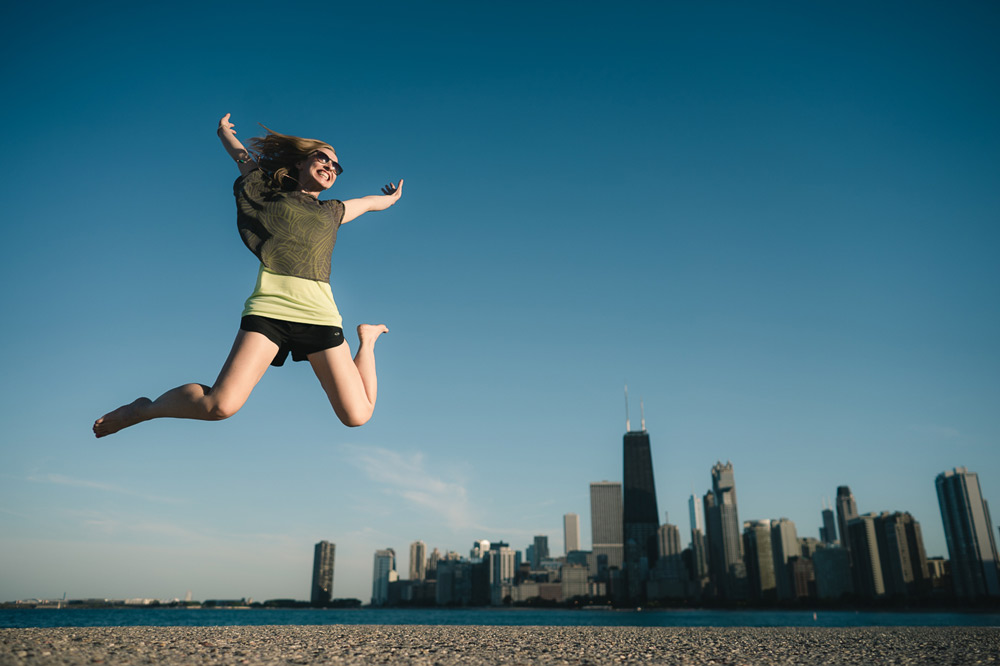
1. City Skyline Jump Shot
- Difficulty: Easy
- Photo Details: Sony a7II + Sony FE 28mm f/2
- Additional Gear Required: No
How To Capture A Jump Shot
This first one’s all about timing. Choose a cool background for your photo, preferably away from a highly trafficked area to make it easy on you. Photographer: Start by framing your shot with a test jump to ensure your model will be fully within the frame. Then work out a countdown (e.g. ‘1… 2… jump on 3’) so you know when to press the shutter. Jumper: Do your best to make sure your face is always visible to the camera. Try a variety of arm and leg positions in your jumps. And be sure to smile!
Make it easier with: continuous shooting mode, manual focus, and a tripod. Framing may or may not be easier with a tripod, depending on the height consistency of the jumps. If you have continuous shooting mode on your camera, use it. You’ll be more likely to catch the jumper at the peak of their jump. Also, if your camera has manual focus mode, you can focus on your model prior to the jump so there’s no delay in shooting.
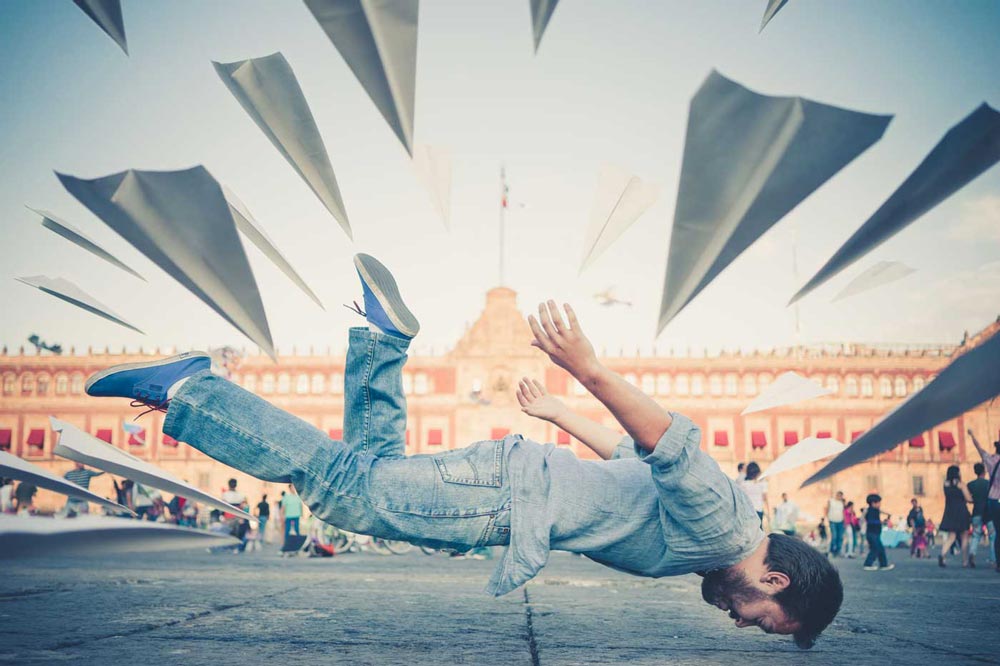
2. Urban Levitation
- Difficulty: Hard
- Photo Details: Sony a7II + Sony Zeiss Sonnar T* FE 35mm f/2.8 ZA
- Additional Gear Required: tripod, stool, Photoshop
How To Capture A Levitation Shot
This photo requires patience, planning, and some extra equipment. You’ll need a small stool to support your model and a tripod for your camera. For a basic levitation shot (human only, no floating objects), you’ll need to take two identically-framed photos: one with your subject supported on the stool and one of the background alone. Once you have your images, open them as layers in Photoshop (background shot on bottom) and mask out the stool so the background shows through. Want to include the floating objects? Capture those photos during your shoot. Again, these need to be identically framed, so you’re taking all of your photos with your camera in the exact same position on a tripod.
Make it easier with: our Skillshare class. It’s free for our blog readers. Ian will walk you through the process of shooting and editing your levitation shot!
3. Patriotic Sunset Portrait

- Difficulty: Moderate
- Photo Details: Sony a7II + Sony Zeiss Sonnar T* FE 35mm f/2.8 ZA
- Additional Gear Required: flag, light reflector (optional)
How To Capture A Patriotic Sunset Shot
Show your country pride with a patriotic portrait at ‘magic hour.’ Find a place with a pretty background when looking into the sun at sunset. For best results, flip your camera to aperture priority (A/Av) mode and set your aperture to the widest setting (lowest f/number). Set your ISO to auto if available.
Make it easier with: a reflector and an extra person. The reflector will allow you to bounce the sunlight onto your model’s face so you can see them better in your image. If your subject is still coming out too dark, try increasing the exposure +1 or +2 with the exposure compensation control.
See more from our American Women photo shoot on my women’s travel blog, Stylish Travel Girl and view a detailed tutorial of this shooting method (plus a few similar ones) in Ian’s Simple Sunset Portraits tutorial on The Photon Collective.
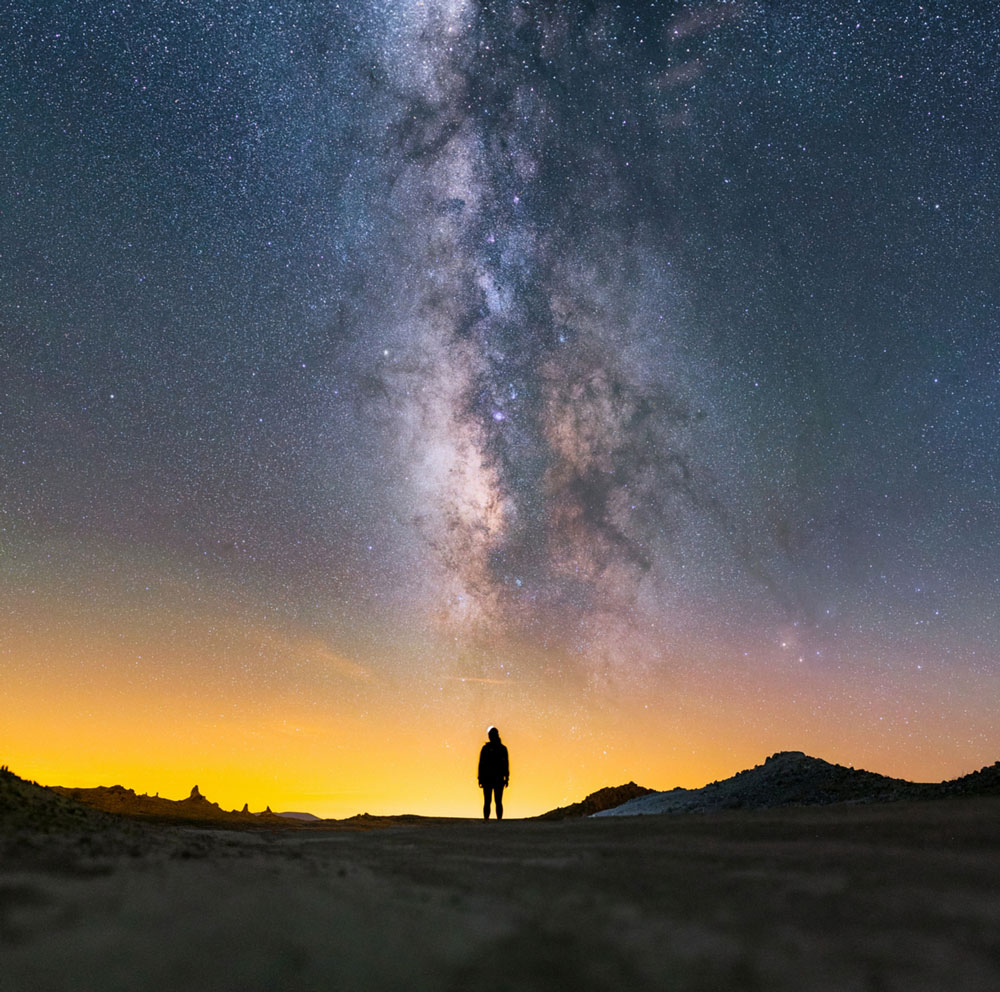
4. Silhouette Under the Stars
- Difficulty: Moderate
- Photo Details: Sony a7S + Voigtländer 50mm f/1.1 Nokton
- Additional Gear Required: tripod, manual camera settings enabled, RAW photo editing software
How To Capture Starry Silhouette Shot
It’s easier than it looks — I promise! It just requires a tripod and a camera with manual settings so you can crank up your exposure time. You’ll also want a way to edit your photo to make it look as awesome as possible. There are a lot of steps for this photo, but it’s actually not super complicated. Here’s a quick overview: (1) Go to a dark place at night when the Milky Way is up. (2) Set up your camera on a tripod. (3) Set your camera to RAW shooting mode. (4) Set your aperture (f/number) on your lens to the smallest number, set your ISO high – 1600+ and set your shutter speed to 10 seconds (this will vary depending on your lens and camera) (5) Focus on the stars (at or near the infinity mark on your lens) (6) Take test shots to get the best framing and exposure (7) Take your shot with your model standing as still as possible to reduce blurriness in their silhouette. (8) Edit your photo to make it look awesome.
Follow Ian’s full How to Photograph the Milky Way tutorial over on Lonely Speck for a detailed description of the above steps. There you can also learn how to find the Milky Way and use our Milky Way exposure calculator to determine what settings to start with for your particular lens and camera. Adding in a model is simple. Just communicate when you’ll be starting the shot and how long it will be — have the model stand really still — and let them know when it’s finished so they can relax.
Make it easier with: our Skillshare class. Ian will walk you through capturing one of these starry selfies yourself!
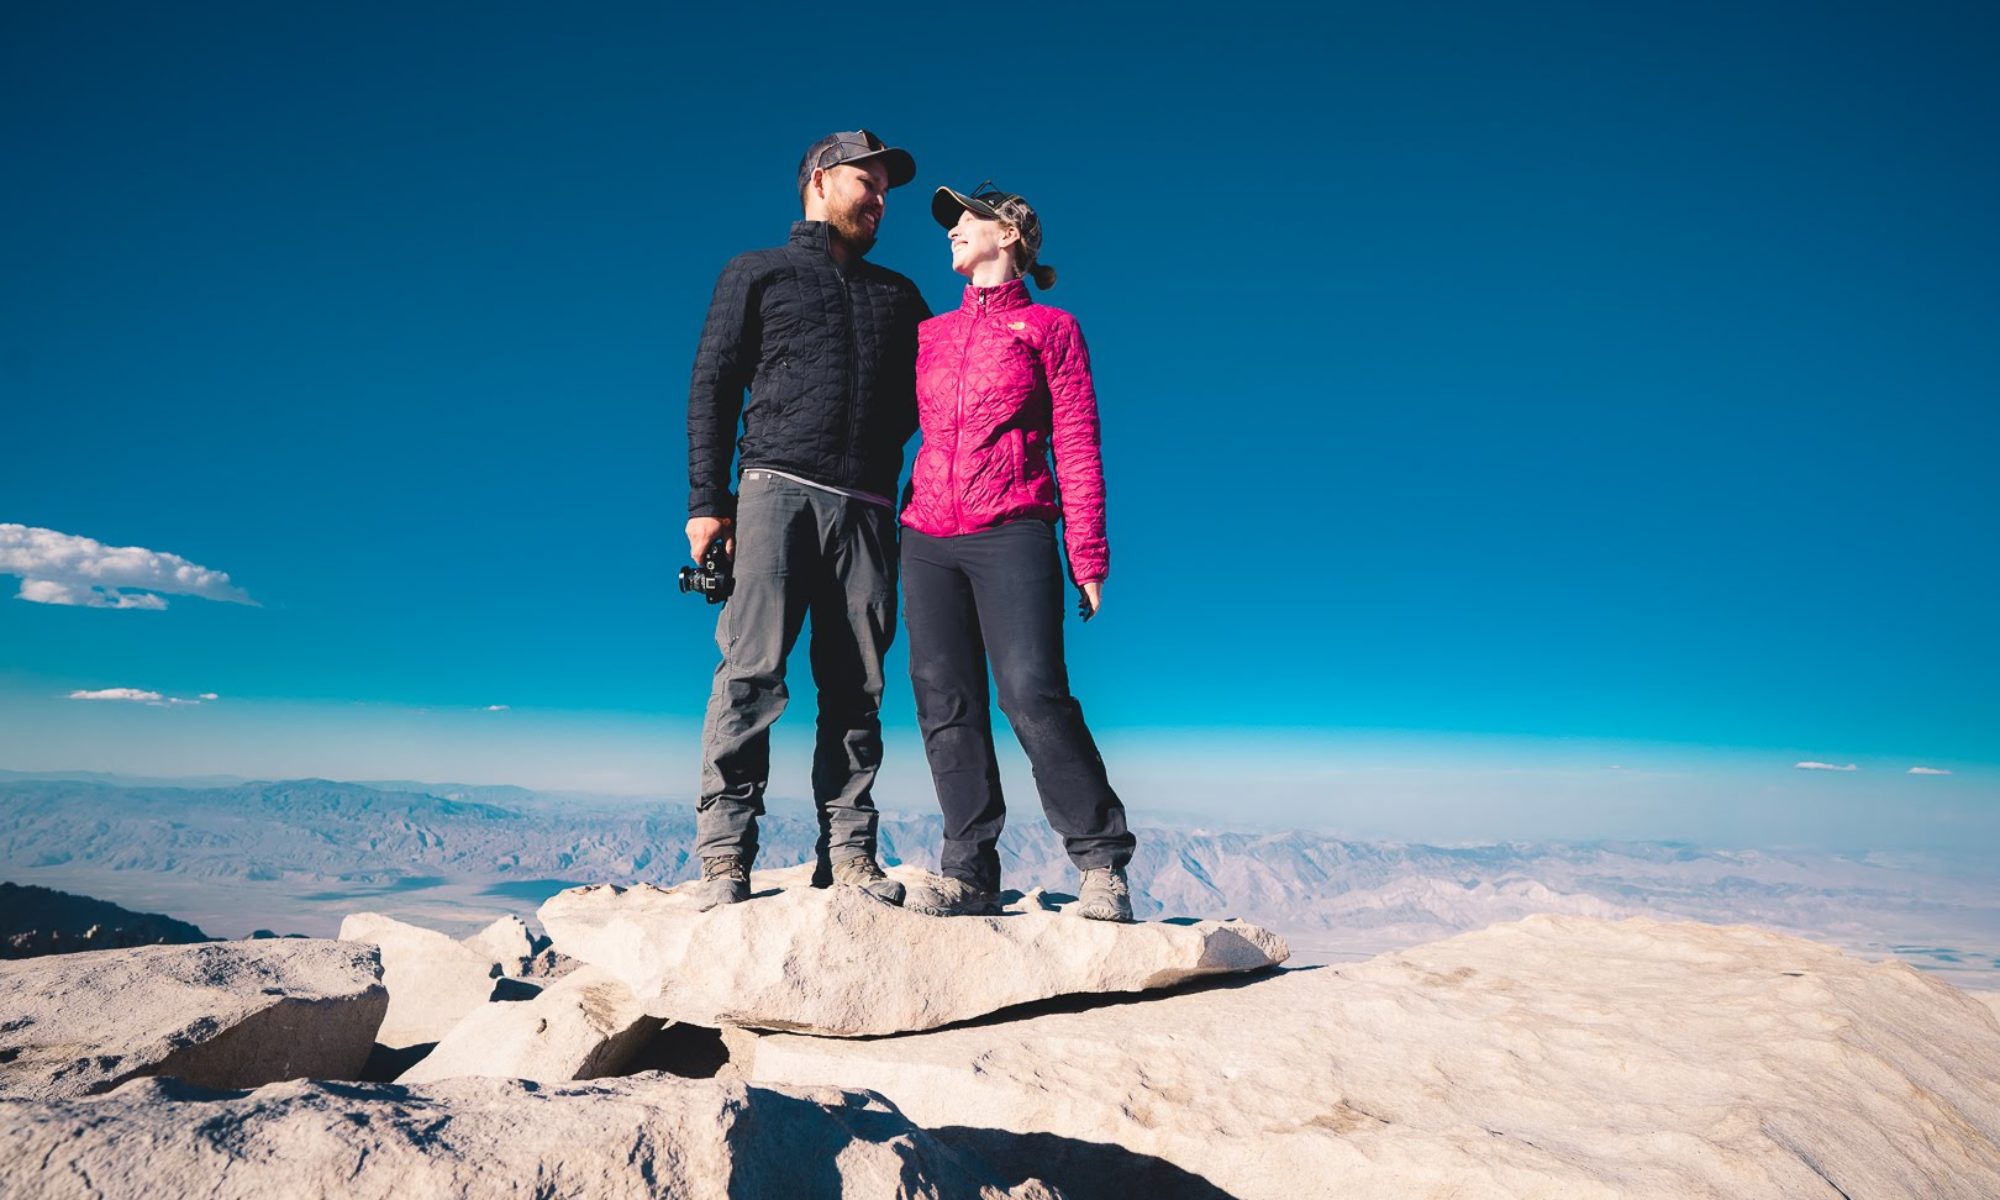
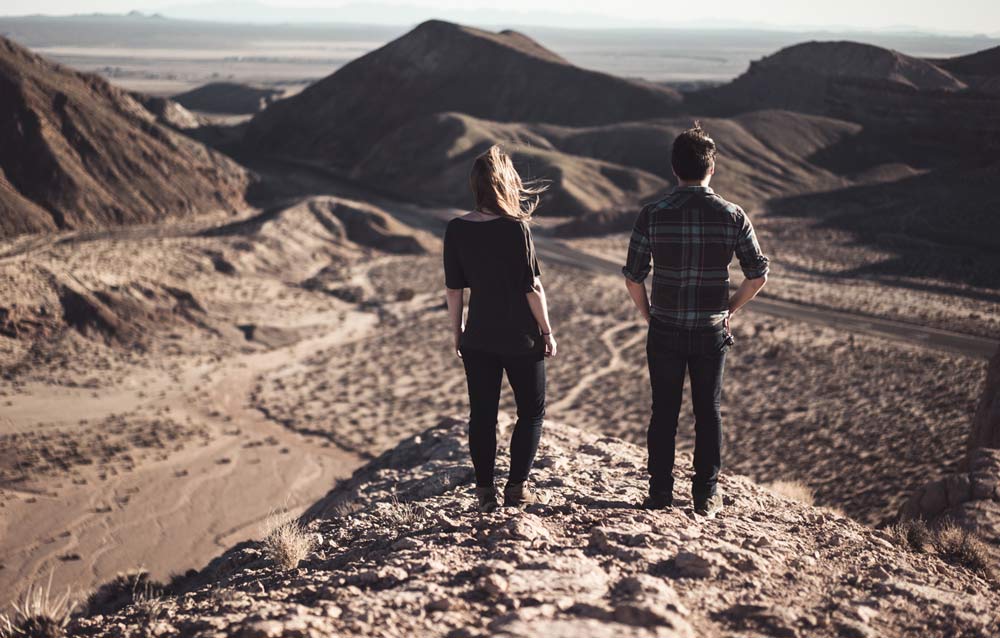
5. Couple’s Landscape Lookout
- Difficulty: Easy
- Photo Details: Sony a7S + Sony Zeiss Sonnar T* FE 55mm f/1.8 ZA
- Additional Gear Required: tripod, 10-second in-camera self timer
How To Capture The Couple’s Landscape Lookout
A selfie alternative for traveling pairs, you just need a tripod and your camera’s built-in timer delay for this shot. Have one person frame and focus the shot (manual focus is best) and switch to 10-second delay mode. Press the shutter, jump in, and stand still. Listen for the shutter if yours is audible so you know when the shot’s complete.
Make it easier with: an intervalometer. This is built in to some cameras and some smartphone apps, and it allows you to take multiple shots with a designated amount of time between each. If you use an intervalometer, you can capture multiple positions all at once without needing to run back to the camera to press the shutter. You can also use a wireless remote to trigger the camera.
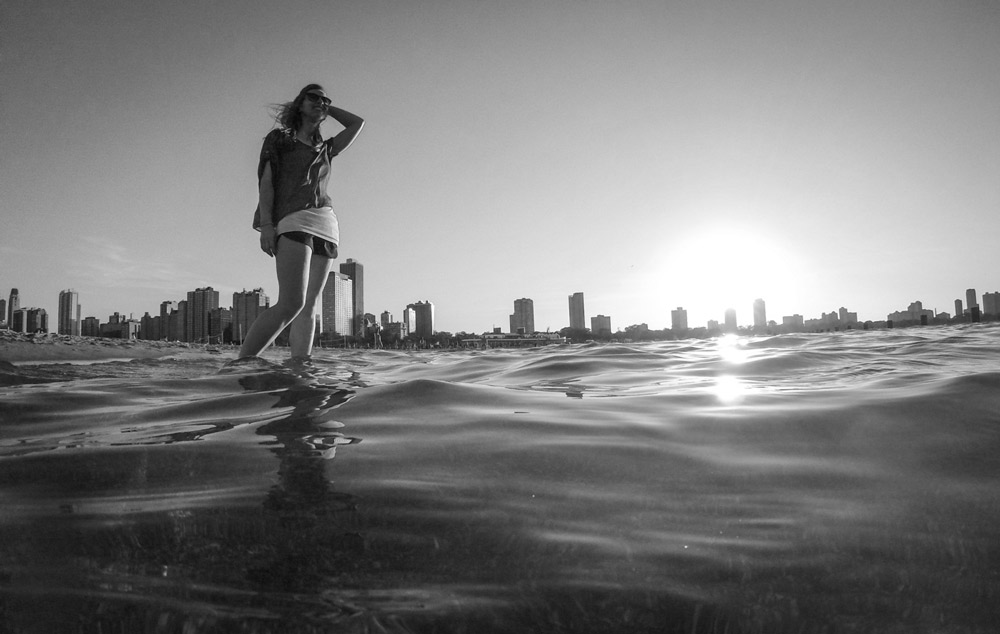
6. Just Barely Surfaced
- Difficulty: Easy
- Photo Details: GoPro HERO4 Session
- Additional Gear Required: GoPro smartphone app (free)
How To Capture A Photo From A Water Surface
First off, you’ll need a waterproof camera or a waterproof casing for your camera. I used the new GoPro HERO4 Session for this shot, which is waterproof all on its own. (I still can’t get used to being able to dip that camera in the water. It’s awesome!) Place the camera about 1/3-1/2 in the water and shoot. (Note: If you’re using the Session like we did, you’ll have to operate it with your smartphone app in order to capture still shots. Make sure you don’t get your phone wet!)
Make it easier with: a wide angle lens. The GoPro is perfect for this. It makes aiming easier, so you’ll end up with a lot more potentially great shots.
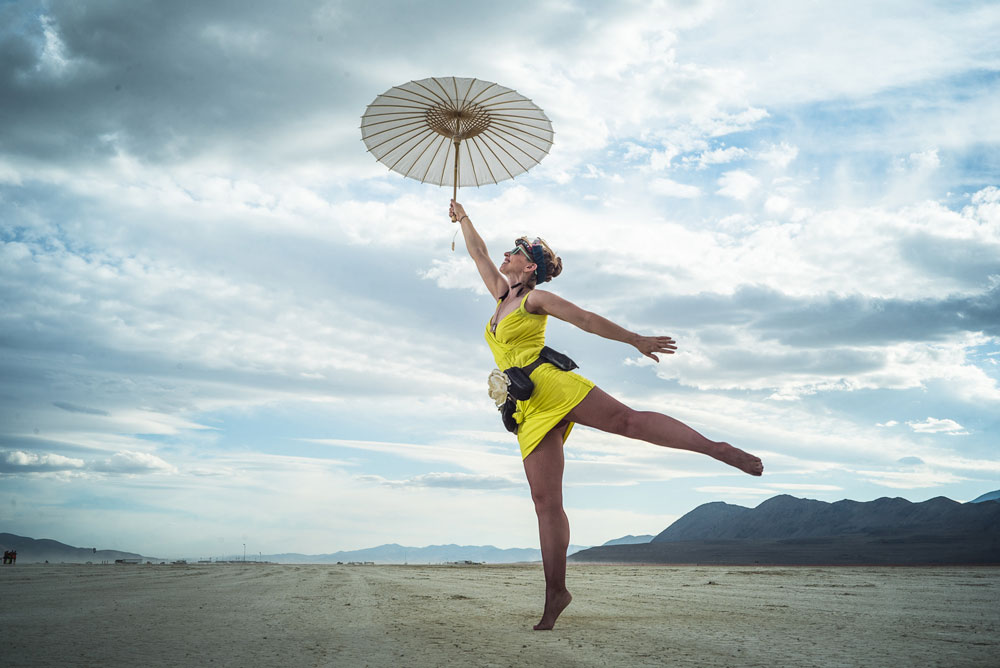
7. Desert Landscape Dress-Up
- Difficulty: Moderate
- Photo Details: Sony a7S + Voigtländer 40mm f/1.4 Nokton S.C.
- Additional Gear Required: off-camera flash, wireless trigger, light stand (or extra person)
How To Capture A Desert Landscape Dress-Up Shot
It’s time to play dress up! After two years of Burning Man photo shoots, these are now a tradition for us. But you don’t have to be a Black Rock City dweller to get a shot like this. Any dry lake bed desert landscape will do. Set up an off-camera flash on a light stand to shoot your model from the side of the frame (90 degrees from where you’re shooting). Attach a flash trigger to your camera and set your camera to manual exposure mode (M), using 1/125th, f/16 and ISO 100 for your shots. Play around with the strength of the flash to get the most natural look. Then shoot away!
Make it easier with: an extra person rather than a flash stand. You can more quickly change the angle and strength of the flash by having a photo assistant do it for you. If you’re shooting a bunch of people, just rotate duties. One person on props, one person on flash, etc. It takes some practice, but you’ll get the hang of it.
Check out our portraits from Burning Man 2014, and view a detailed tutorial of this shooting method (plus a few similar ones) in Ian’s Simple Sunset Portraits tutorial on The Photon Collective.
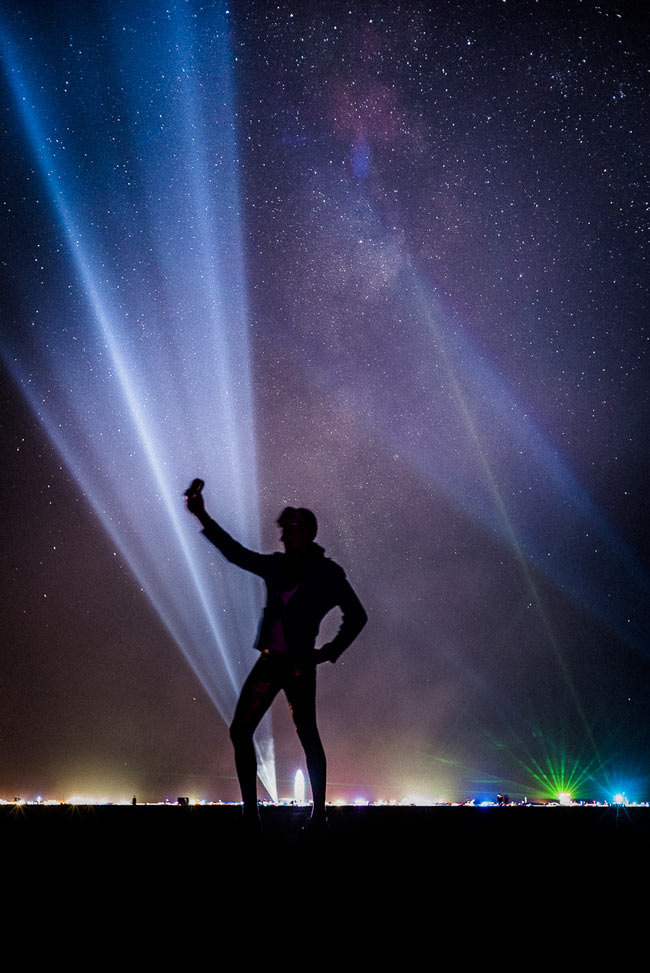
8. The Black Rock City Night Silhouette
- Difficulty: Hard
- Photo Details: Sony a7S + Voigtländer 40mm f/1.4 Nokton S.C.
- Additional Gear Required: tripod, manual camera settings enabled, RAW photo editing software
How To Capture A Night City Silhouette
Your camera will need to be on a tripod for this long-exposure shot. If you want to capture the Milky Way, then the method for this one’s exactly the same as #4. You’ll just need to adjust your exposure time for the amount of light in the background. With extensive editing, we were just barely able to pull out the Milky Way in this silhouette portrait from Burning Man. (Note: It is pretty darn tricky to capture the Milky Way with a real city’s lights in the background. Black Rock City, a temporary manmade desert city, is still pretty dark in comparison to the intensity of a normal city’s lights. So don’t be too disappointed if you can’t capture the stars in a photo like this.)
If you’re less worried about capturing the Milky Way, the only difference in method is that you’ll want to focus on the person instead of the stars. Do this by giving your model a headlamp or other bright light to hold that you can use to manually focus your shot.
Make it easier with: a simple pose. It’s hard to hold your arms completely still when they’re up in the air (notice the slight blur in Dave’s arm in the shot above). If you choose an easier pose and your focus is accurate, you can get crisper edges.
Check out all of our Burning Man portraits from 2014!
9. The Group Jump Shot

- Difficulty: Moderate
- Photo Details: Sony a7S + Voigtländer 40mm f/1.4 Nokton S.C.
- Additional Gear Required: tripod, off-camera flash, light stand
How To Capture A Group Jump Shot
This is a really fun one. And it’s pretty tricky to time a group jump. Practice counting your jump a few times before you start trying to capture it. Then simply follow the steps in #1.
Make it easier (and get everyone in the shot) with: a remote or a 10-second timer. Find one that beeps to indicate it’s about to go off. Your camera may do this itself (and have an indicator light on the front of the camera that coincides with the beeps). Pay attention to the beeps/lights so you can time your jump altogether for the shot.
(Note: From our example you can tell this is more difficult than it sounds. We didn’t manage to get a single photo with everyone’s feet off the ground. But I think that adds humor and makes it even better!)
Share Your Results!
We’d love to see the shots you take with these DIY vacation photo ideas! Share them with us over on Facebook.
[mc4wp_form id=”9400″]
Incredibly creative photos! The silhouette under the stars is my favorite. Photos from my travels (and life in general) are incredibly important to me and far outweigh the value of my other possessions. Though having our own place is far off for now, I really look forward to showcasing them someday.
Thanks Alana! The starry ones are our favorites, too. (Although I do have a ton of fun with those jump shots …)
And same for me. I’d love to display our photos in print somewhere, but Facebook and Instagram will have to do for at least the foreseeable future. 🙂
Those jump shots are my fav too… I try to make it my signature shot wherever we go 😉
And the group jump shots always turn out especially silly! 🙂
I love group jump shots but agree it is so hard to get one with everyone’s feet off the ground. We took some hilarious ones recently when my sister and her boyfriend were visiting us.
At the very least, they always certainly guarantee a good laugh. 🙂
What a fun post. I’ll have to try some of these next time I travel. I really like the couples landscape and the milky way shot. Thanks for sharing.
It’s funny, my wife and I estimate we have traveled over 3 million miles together over the last 11 years. Between Asia, Australia, Europe, South and North America… I would bet we have actually BOUGHT 3-4 T-shirts, maybe 10 stickers and 2 fleeces (in Whistler, BC as it was colder than we expected in August!) as souvenirs…. but I have two 2TB hard drives full of pictures!
I can go back through them and feel where I was at the time.. smell the aromas… taste the food.. even hear the sounds…
They do hold the true memories for us.. more so than trinkets that fade or get lost in the shuffle. They place you in the moment… so you can experience it all again..