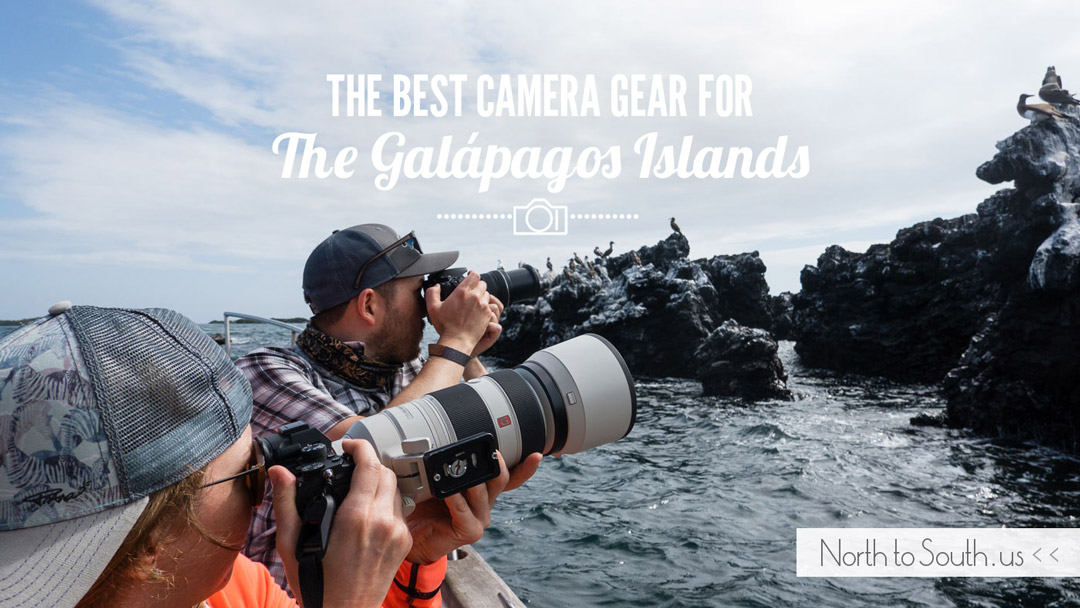
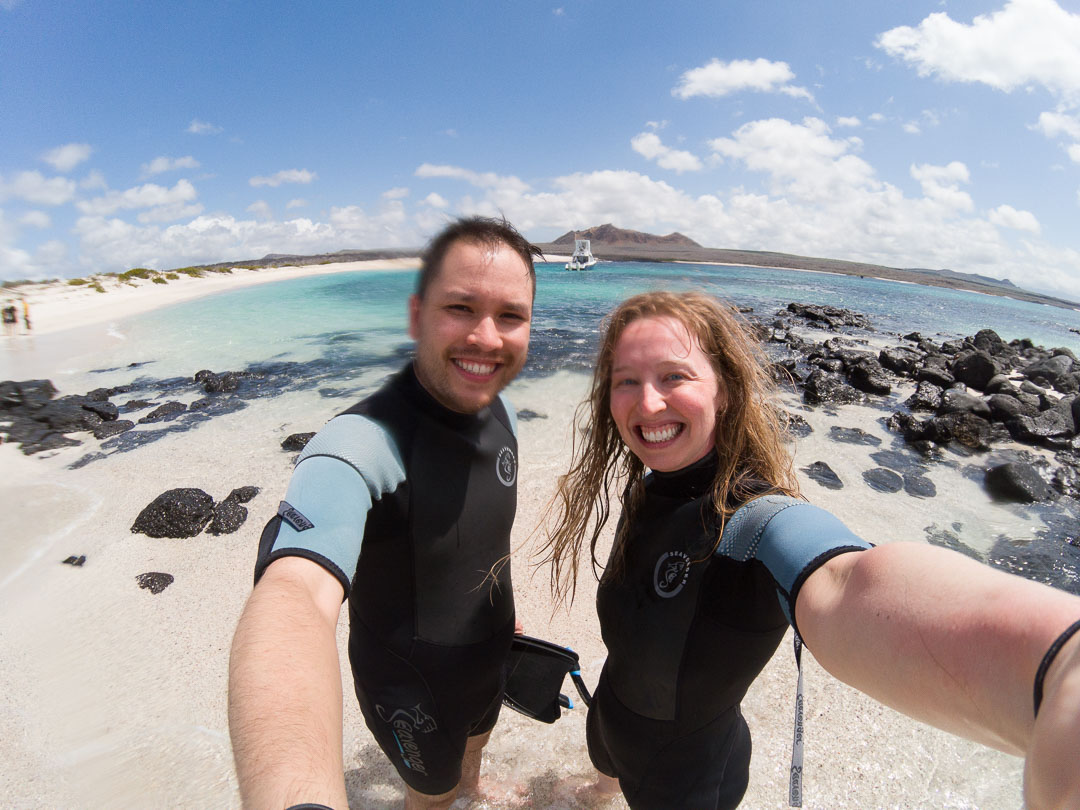
The Galápagos Islands are a wildlife photography paradise. Of all the places we’ve visited around the world, the Galápagos Islands were the most spectacular place for seeing and photographing wildlife.
We put a lot of thought into the photography gear that we would bring for such a trip, and we learned pretty quickly what was most valuable to us for capturing all of the amazing animals around the islands. In this post we share our list of the best photography gear for photographing wildlife in the Galápagos Islands, with options for different levels of photography experience and trip packing desires.
In our Galápagos Islands packing list, we recommend bringing both an underwater camera (like a GoPro) and a camera with zoom for photographing wildlife on land. Here’s what photography gear we brought to the Galápagos Islands and how well it accomplished our goals for our trip.
Essential #1: Underwater Camera (GoPro)
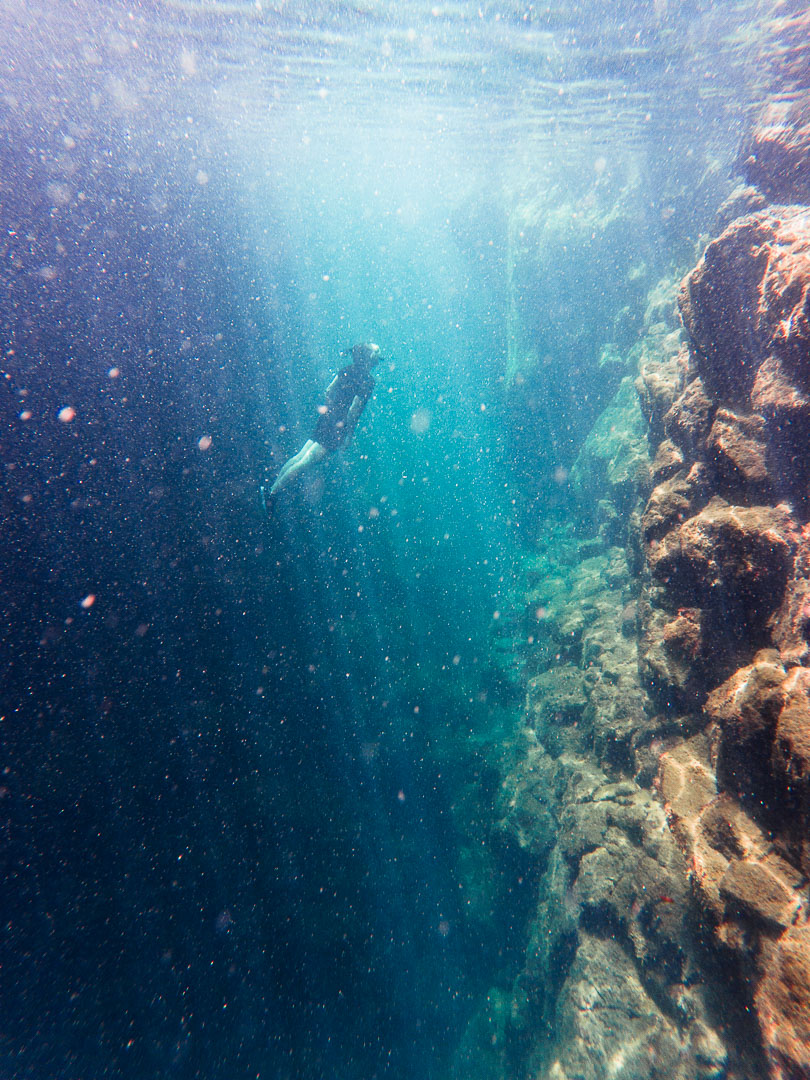
The easiest to carry, most durable, and smallest camera we brought was a GoPro HERO Action Camera. On the Galápagos, we had numerous snorkeling opportunities every day, and that made the GoPro one of our most used cameras. The biggest reasons why the GoPro was so useful are its size, ease of use, and underwater capability.

We used it to record hundreds of video clips and raw photos throughout our entire trip, whether that was just roaming around the beach, traversing islands on boat, snorkeling with sea lions, or free diving to get a better view.
While the GoPro is capable of being used underwater without a housing, we also paired ours with the robust underwater housing to protect the GoPro on deeper free-dives while snorkeling.
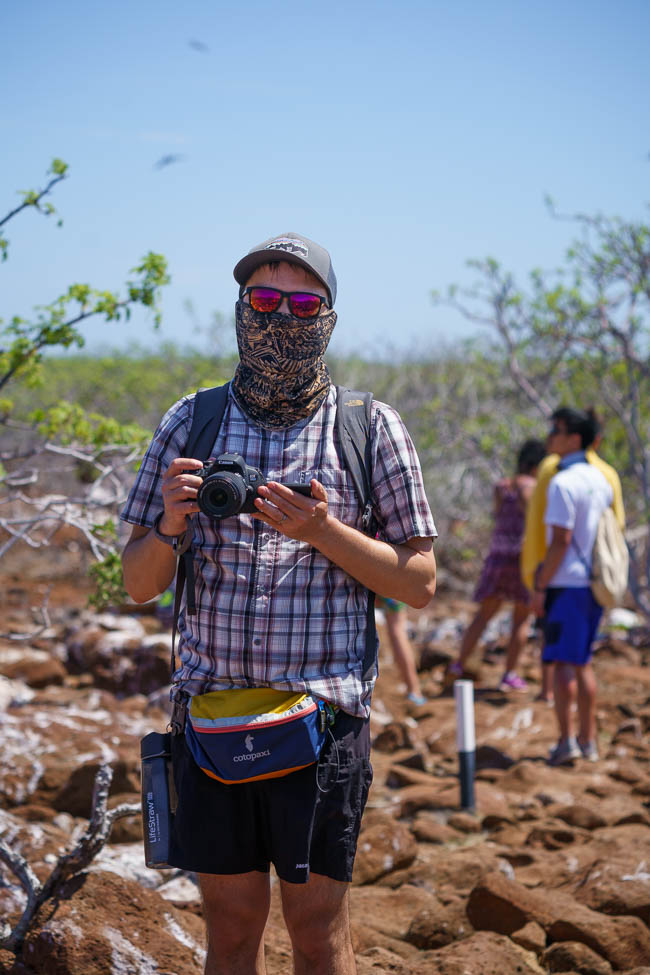
Little things made the GoPro especially nice to use on our trip: A quick-start one-button press to start video recording ensured that we didn’t miss a moment, and even voice activated commands like “GoPro, start recording” or “GoPro, take a photo” allowed us to get the shot (when out of the water) without needing to press a button. It’s also so small that I continuously carried it in my fanny pack each and every day for quick and easy access at any moment.

All of the GoPro’s features come together into a package that made capturing our trip extremely fast and simple. Also, the fact that it supports raw photo capture is a feature that dramatically improved our confidence in the quality of its photos. Raw photos are easier to edit for things like exposure, white balance and contrast in apps and software like Snapseed or Adobe Lightroom. We could even recharge it easily on the go by plugging it into our USB battery.
More than any other camera, the GoPro is the one we’re most happy that we brought. Without it, we’d have missed so many amazing photo opportunities. Ours (the HERO5 Black) is an older model that’s since been discontinued and replaced by a few newer versions like the HERO8 Black. The HERO8 Black adds significantly better video stabilization and higher 4K frame rates for better slow motion video. Given just how much we loved using the HERO5 Black, we’ve already decided to upgrade to the HERO8 Black for the future, especially for its improved video stabilization.
The GoPro will have you covered for most traveler’s underwater photography needs. If you’re looking to do more serious underwater photography (or if you want to get close-up photos), you may consider buying a camera with an underwater housing option. However, the GoPro’s ease of use and relative affordability makes it the best overall choice for underwater photography.
Here’s a complete breakdown of the GoPro Kit that we’d recommend for the Galápagos Islands:
- GoPro HERO8 Black
- GoPro The Handler Floating Hand Grip
- GoPro Protective Housing for HERO8 Black
- SanDisk Extreme 256GB MicroSD Card
We recommend a backup MicroSD card or an on-the-go card reader for transferring files to your phone’s SD card or internal storage.
Essential #2: Zoom Camera for Wildlife on Land (3 options)
The next three camera setups are for land-based wildlife photography, and what we recommend depends on your experience level with photography and how much room you have in your bag for packing your camera gear.
We recommend combining any of the options below with an underwater camera (see above) for a complete Galápagos Islands photography kit.
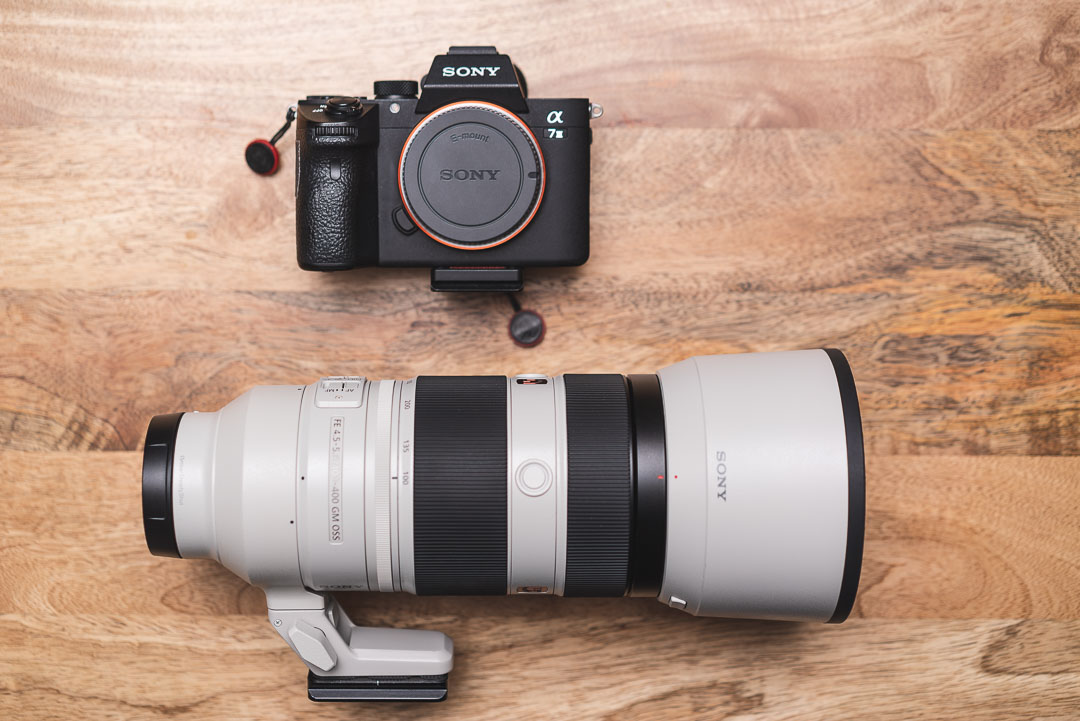
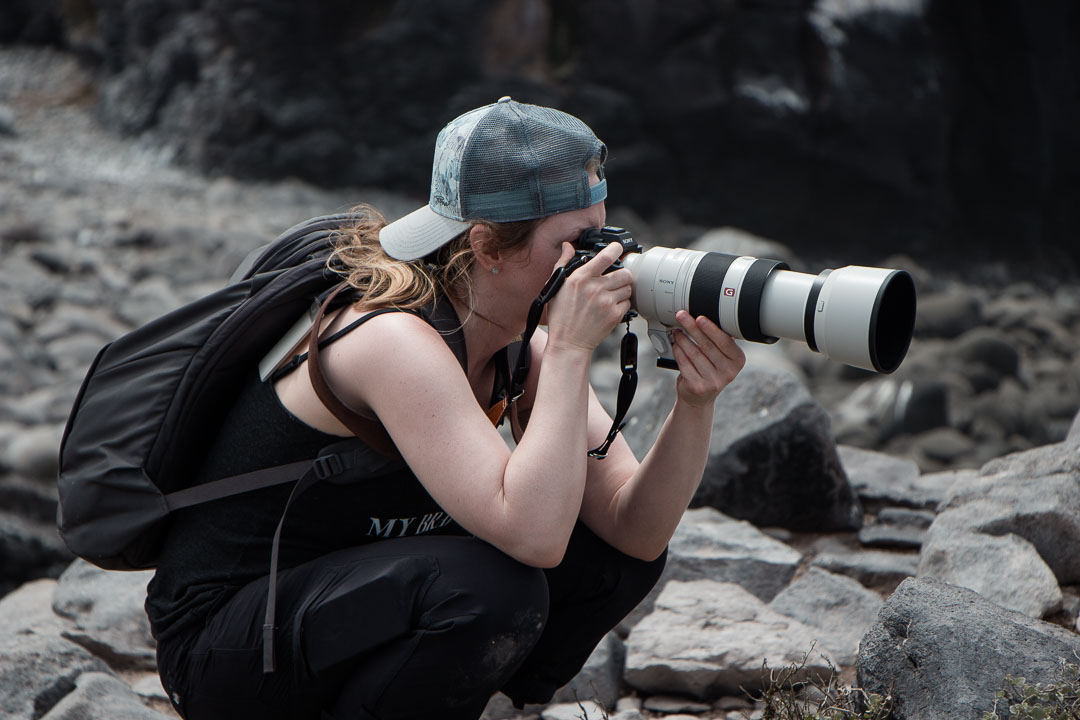
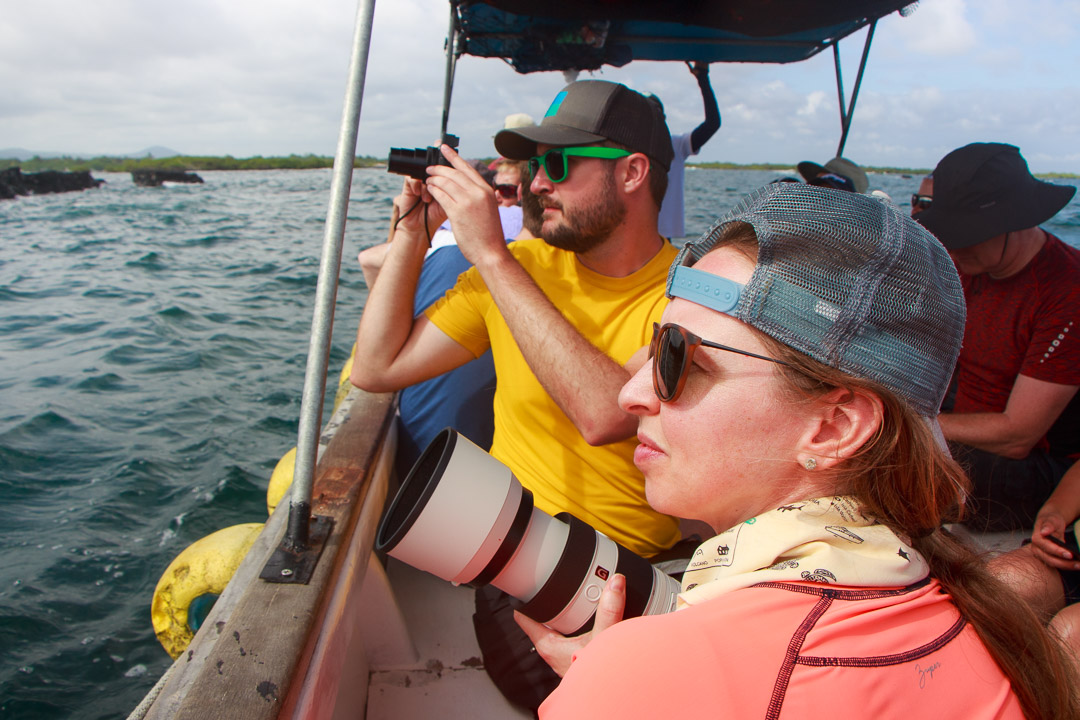
Top-of-the-Line Wildlife Kit: Sony a7III and the 100-400mm Telephoto Zoom
Diana’s kit, and our top choice for wildlife photography, is the Sony a7III paired with the FE 100-400mm f/4.5-5.6 GM OSS lens, and this is the option we would recommend for experienced photographers.
The Galápagos Islands have endless opportunities to see and photograph wildlife, and having a proper telephoto lens was extremely useful on our trip.
The official Galápagos National Park rules dictate that humans, including their cameras, must be no closer than 2 meters from any wildlife. We were surprised how common it was to be so close to many animals.
The rule exists for the protection of the wildlife, and given the abundance of animals that have seemingly no fear of humans, we’re super happy that the rule is in place and enforced. It was respected by most tourists, and everyone was constantly reminded by the passionate National Park guides that led our excursions.
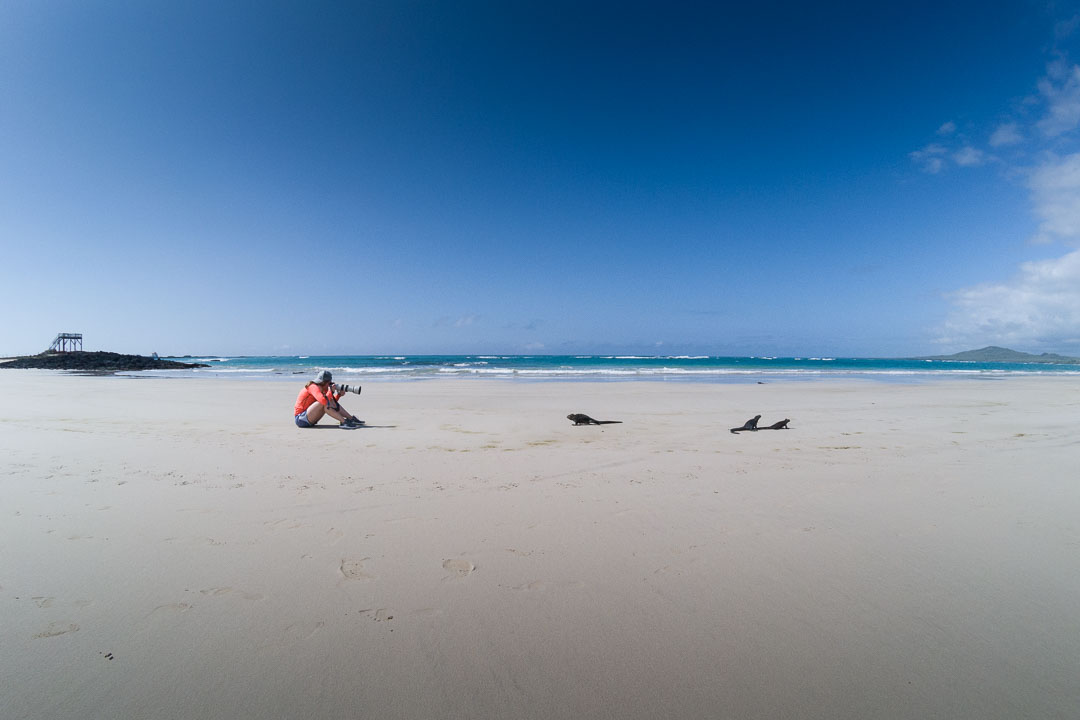
The tremendous zoom reach of the 100-40mm lens made it easy for Diana to capture the endemic birds and reptiles of the Galápagos from a respectful distance.
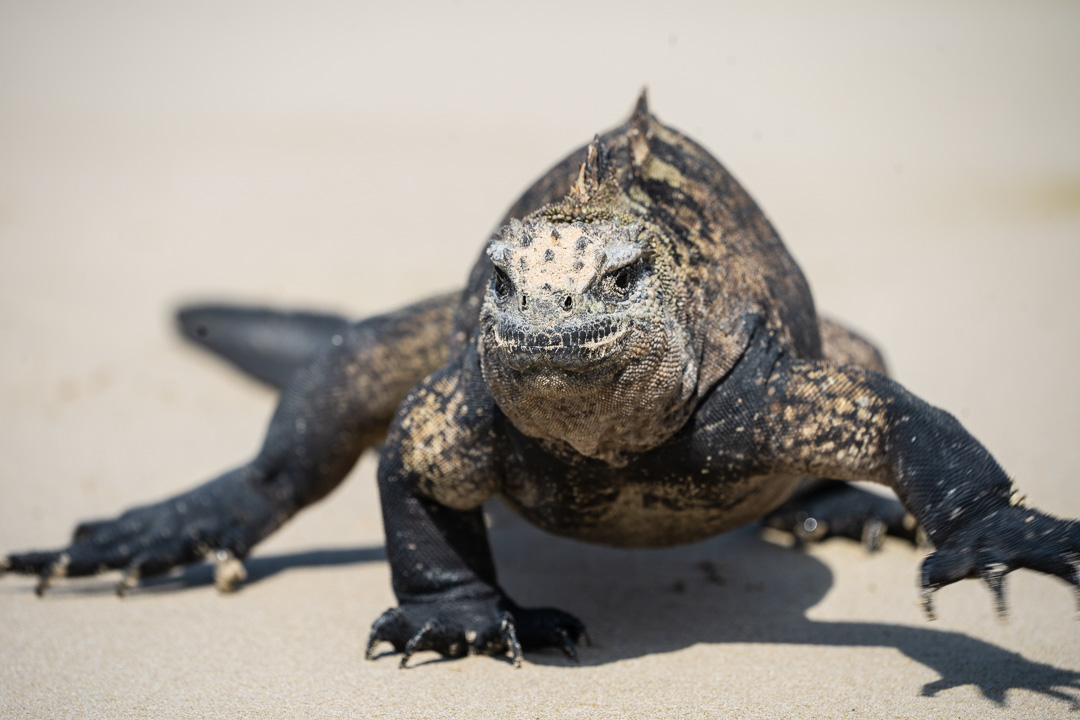
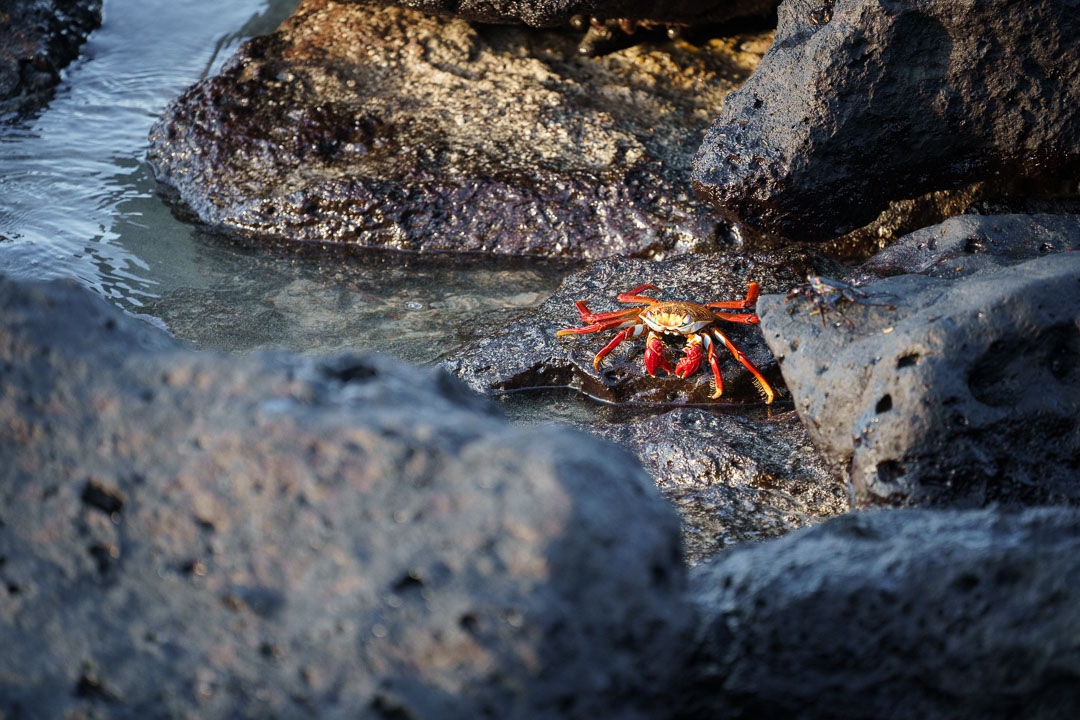
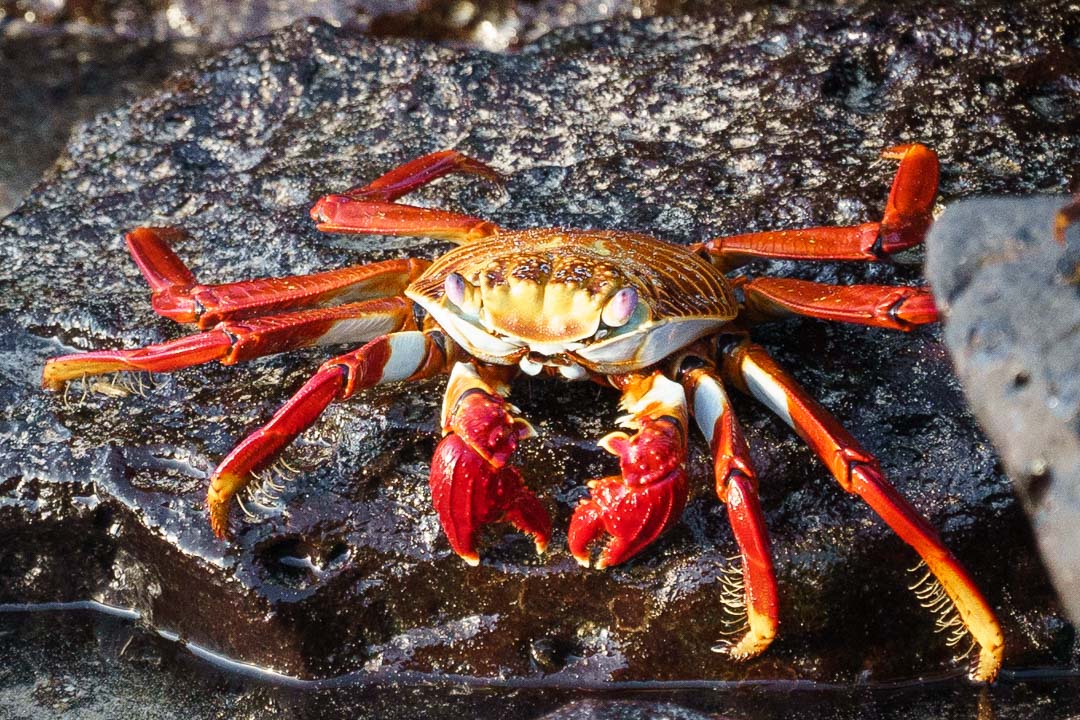
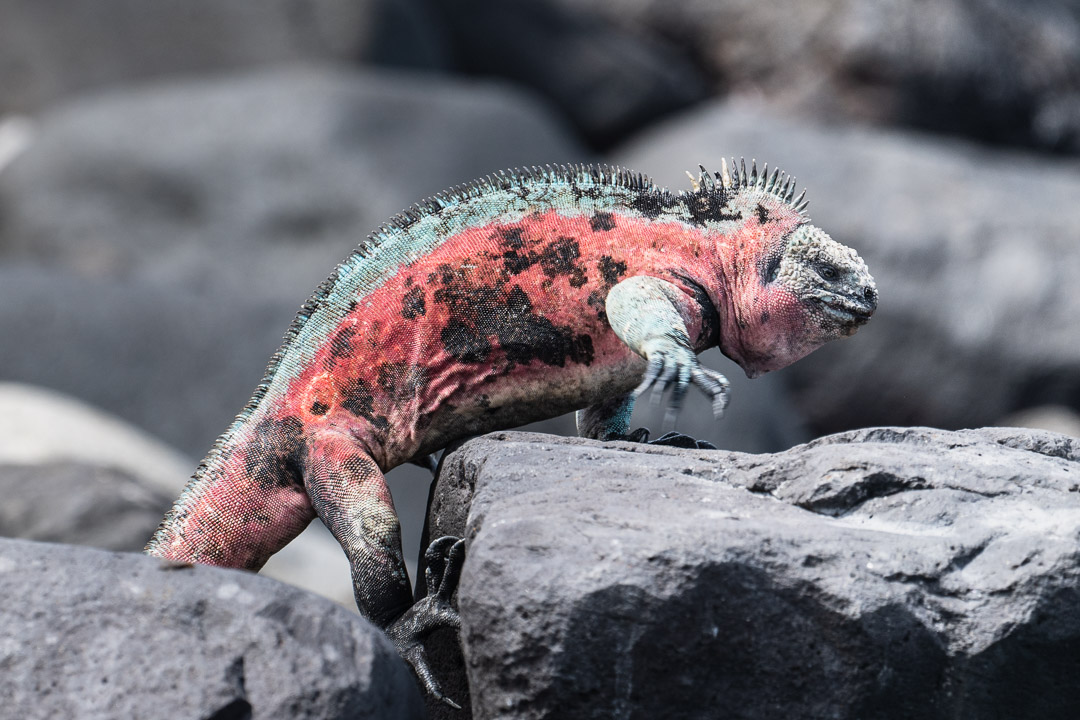
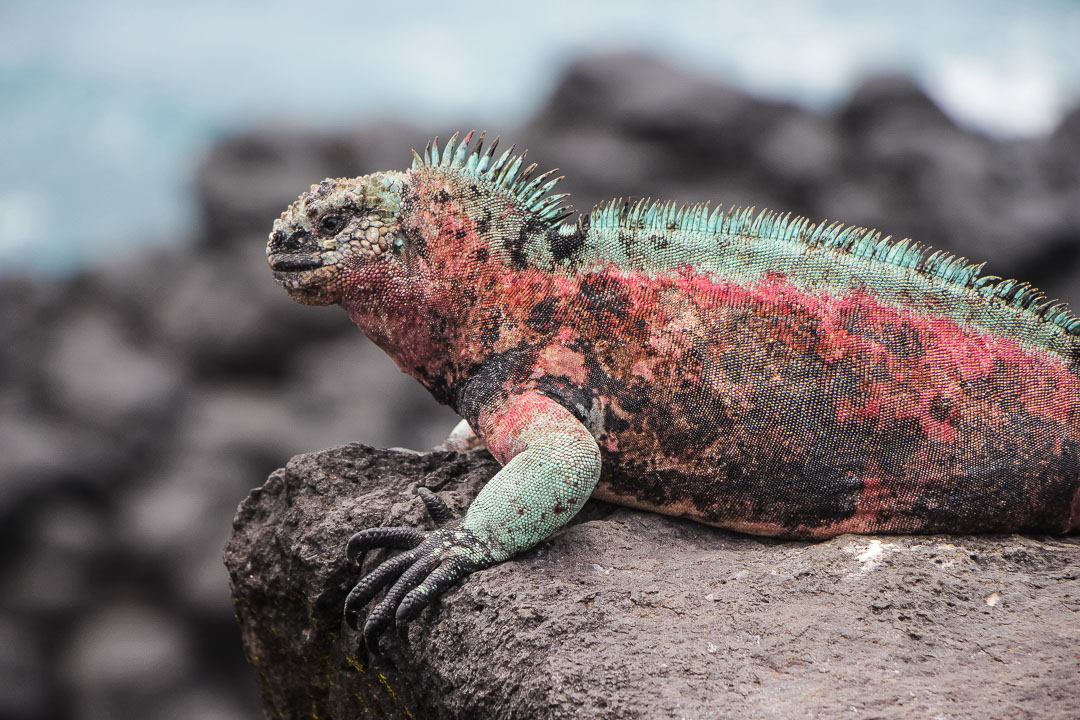
Wildlife was so abundant that it was sometimes difficult to find a suitable path to avoid certain animals, especially the marine iguanas. Other wildlife, like the Sally lightfoot crabs, did a much better job of scurrying away when we got even remotely close.
Diana’s high resolution superzoom setup allowed for even closer views through cropping while maintaining plenty of detail in post-processing.
With the abundance of wildlife on any given Galápagos tour, there were no shortage of moments for Diana to use her superzoom camera kit. One of the things that amazed us the most was the tremendous variety of animals that we were able to see in just a single moment.
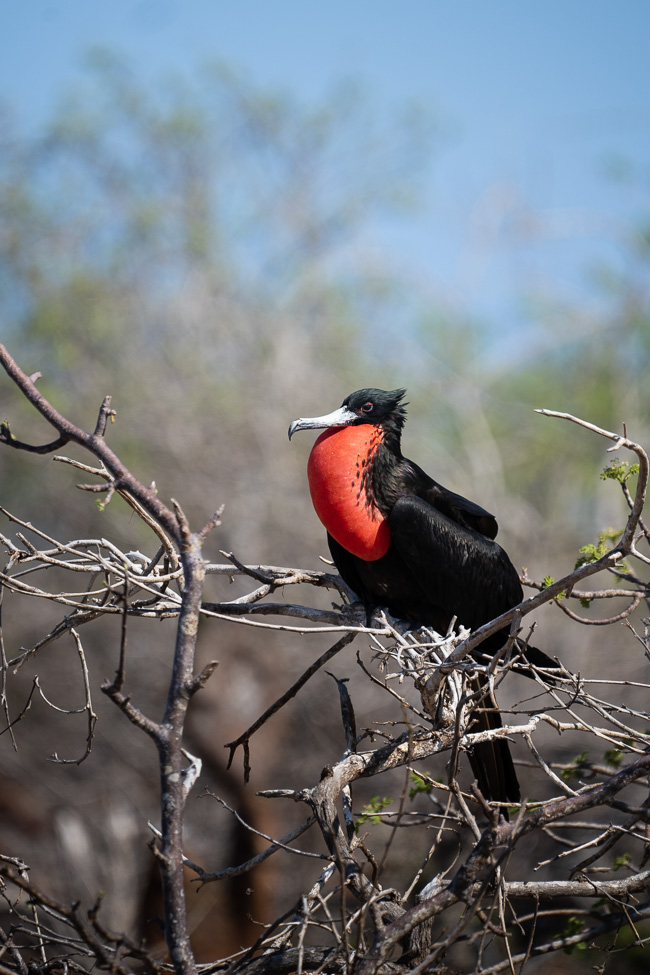
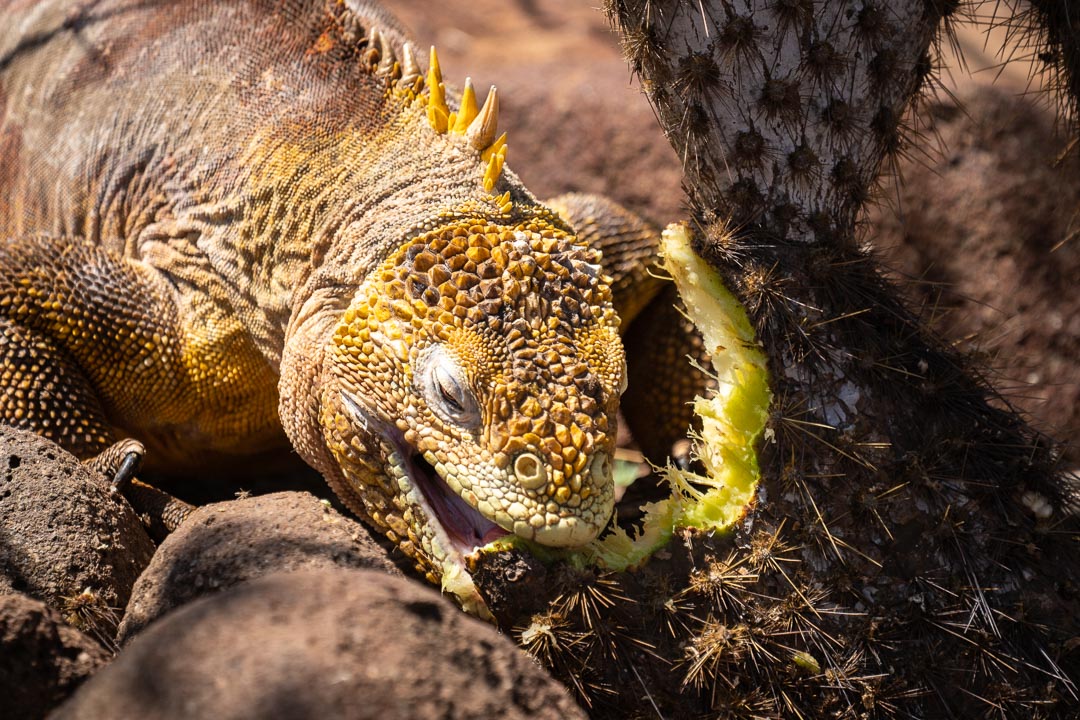
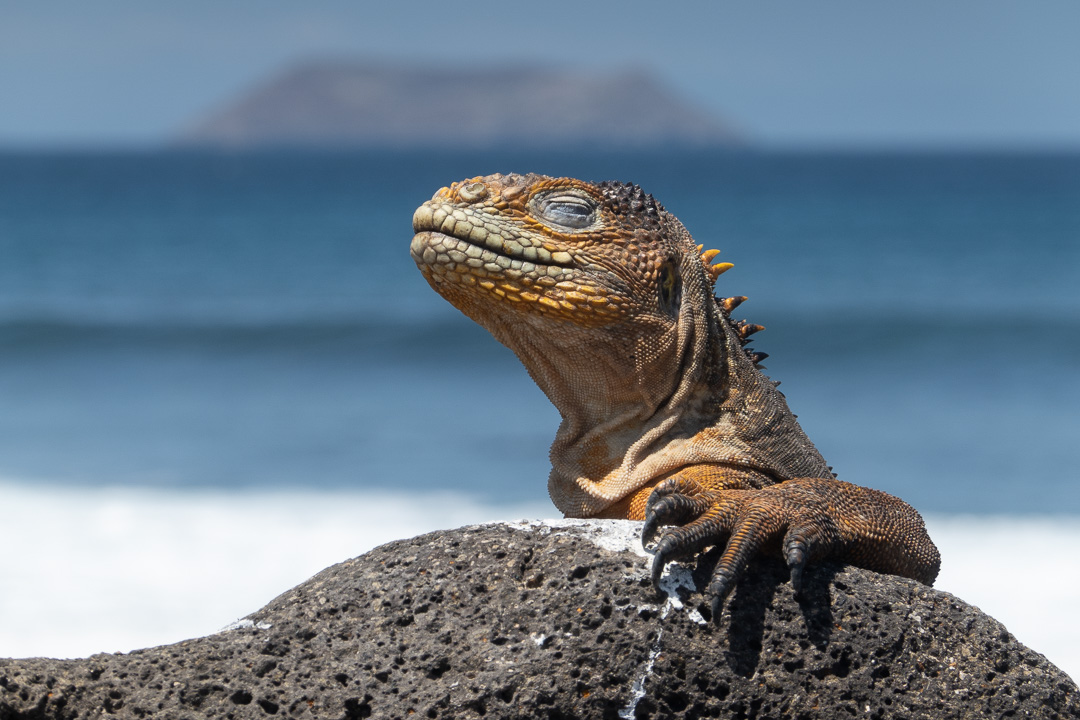
At one moment, Diana could be shooting the red balloon of a distant frigate bird’s mating dance and a moment later she could capture a yellow land iguana chowing down on a cactus, right next to the walking path.
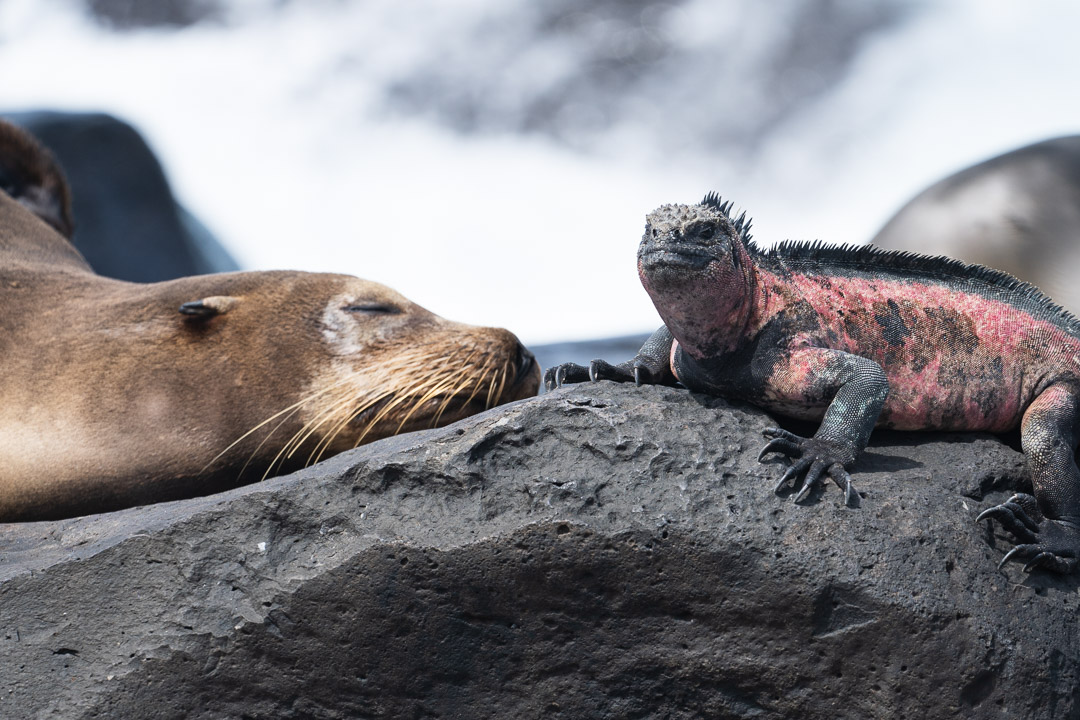
A lot of the time, more than one type of animal would be visible in a single frame. Like these sea lions lounging on the rocks alongside the Christmas iguanas, as if they were buddies.
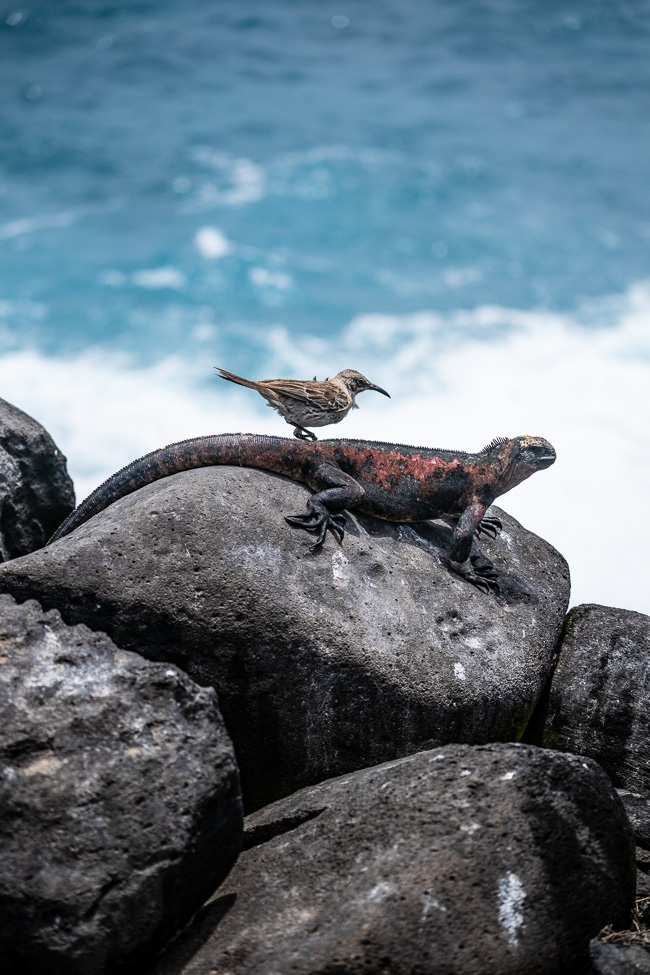
It was also common for Diana to capture fleeting moments that we’d otherwise miss with a slower camera, like this Galápagos mockingbird landing on a Christmas marine iguana on Española Island.
A lot of the wildlife we encountered generally didn’t mind the presence of humans, so it gave us a lot of time to stay in one spot and observe them in their natural state.
Most of the time, we were constrained to a narrow walking path or boardwalk — protections created to greatly reduce human impact on the Galápagos wildlife. Since it was common that we were confined to these narrow paths and unable to venture any closer to the wildlife, the only way to properly photograph more distant animals was with Diana’s a7III and 100-400mm lens.

After analyzing all of the Sony a7III photos that Diana took for the trip, we found that she used the whole range of the zoom, from 100mm all the way to 400mm, depending on the size or distance of the wildlife.
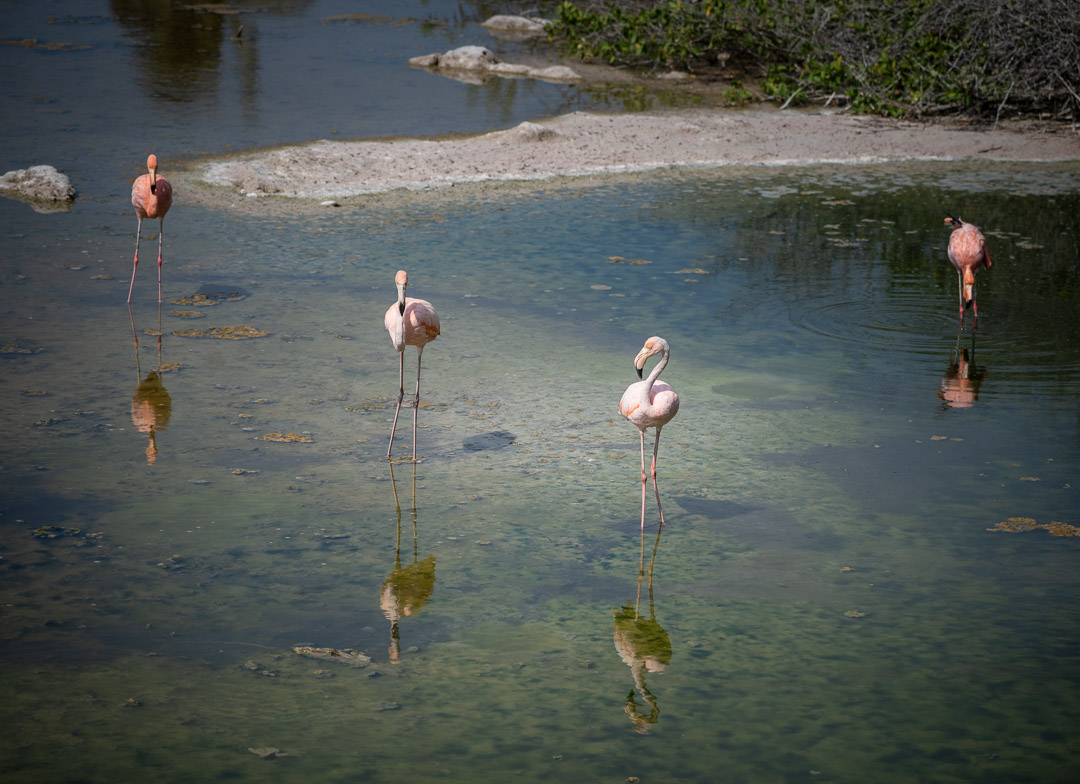
She could zoom out to capture a group of animals in their environment, or zoom all the way in to focus on a specific animal.

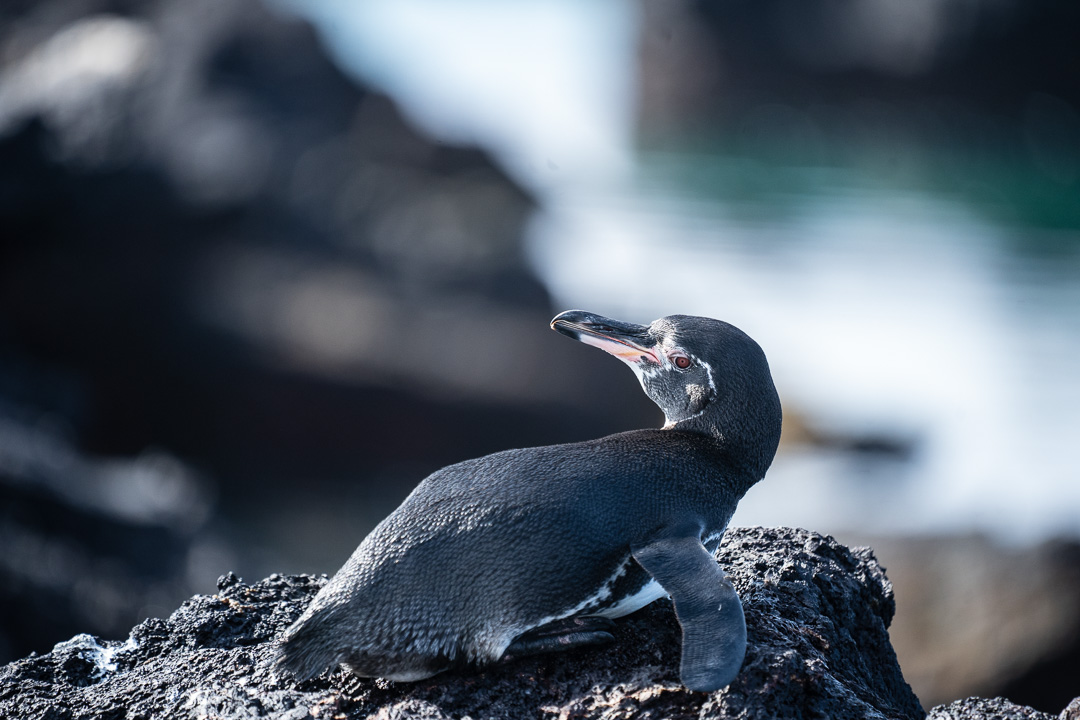
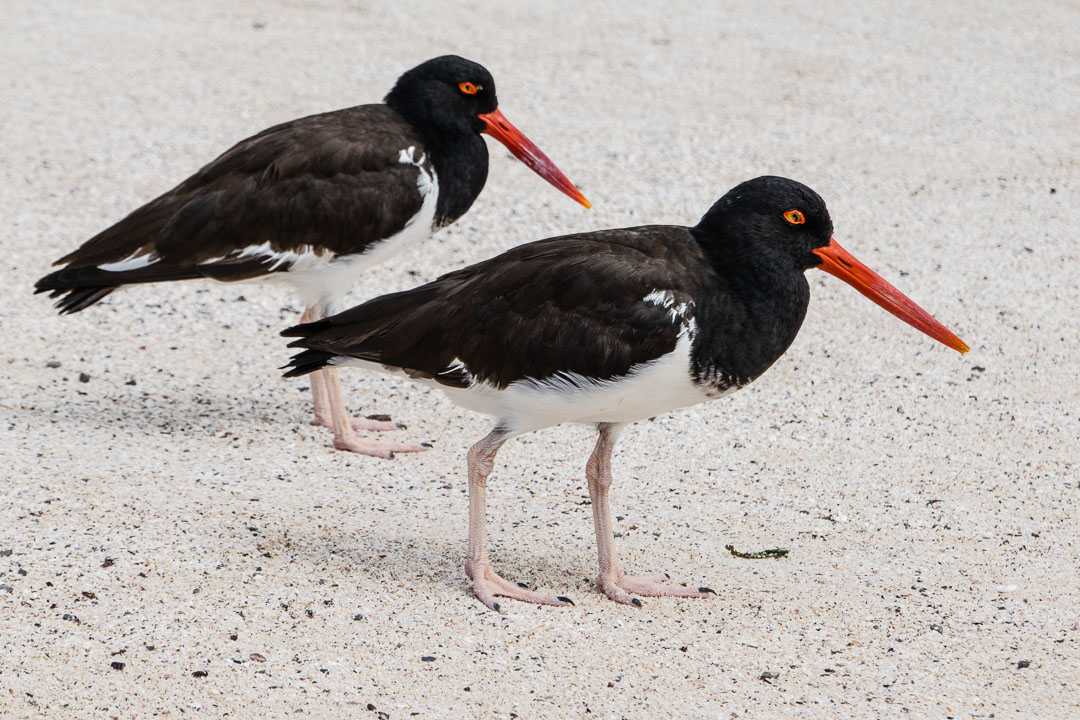
There were also a lot of photo opportunities that would come and go very quickly. Both times that we saw Galápagos penguins on land were short and from a moving boat. Being able to zoom in, focus fast, and shoot a rapid number of shots made it much easier for Diana to nail a shot that she loved.
The a7III shares the same spectacular autofocus system as the professional level Sony a9, so focusing on wildlife, even birds in flight, was extremely fast and accurate.

The a7III has a fairly fast stills shooting rate of 10 frames per second, making it perfect for fast moving wildlife. Most of the marine iguanas on Española island lounged silently in the sun, but occasionally we got to see one scurry along the rocks.
Although a large lens in its own right, the Sony 100-400mm is actually relatively compact. At only 1.3kg, it’s even considered lightweight. It’s lighter weight than Sony’s 70-200mm f/2.8 GM (1.5kg), while providing significantly more reach. Sony also offers an even longer FE 200-600mm f/5.6-6.3 G OSS lens for yet even more reach when zoomed in, but at a much heavier weight of 2.1kg. We also brought a wide angle lens, the Zeiss Batis 18mm f/2.8, with the a7III, but Diana preferred using the 100-400mm lens about 99% of the time.
Most of the excursions you’ll take in the Galápagos are from a boat, so when the waves were high or there was a chance to be splashed, we always kept the Sony a7III and 100-400mm lens stored together in a simple dry bag to keep it safe from the salt water.
Wildlife is the reason you go to the Galápagos. If you’re an experienced camera user, then a fast camera with a proper super telephoto lens is the best tool for capturing your wildlife experience on the islands. Here’s a complete breakdown of Diana’s super telephoto camera kit for the Galápagos Islands:
- Sony a7III
- Sony FE 100-400mm f/4.5-5.6
- 2x SanDisk Extreme Pro UHS-II 128GB SD Cards
- Sea-to-Summit Dry Bag
Budget Camera + All-in-One Zoom Kit
While we wanted Diana to have the ultimate travel wildlife camera and telephoto lens, I personally wanted to try this trip with a budget-friendly camera and a versatile lens. This is an option that would work for any level of photographer, as these cameras have both manual controls and fully automatic modes. It’s also the most affordable option.
I wanted a camera that would let me shoot at short wide angle focal lengths for the occasional landscape shot, all the way to telephoto for wildlife. I decided to dust off our older APS-C Canon T5i/700D with the Canon 18-135mm IS STM lens, and I think that fit the bill almost perfectly.
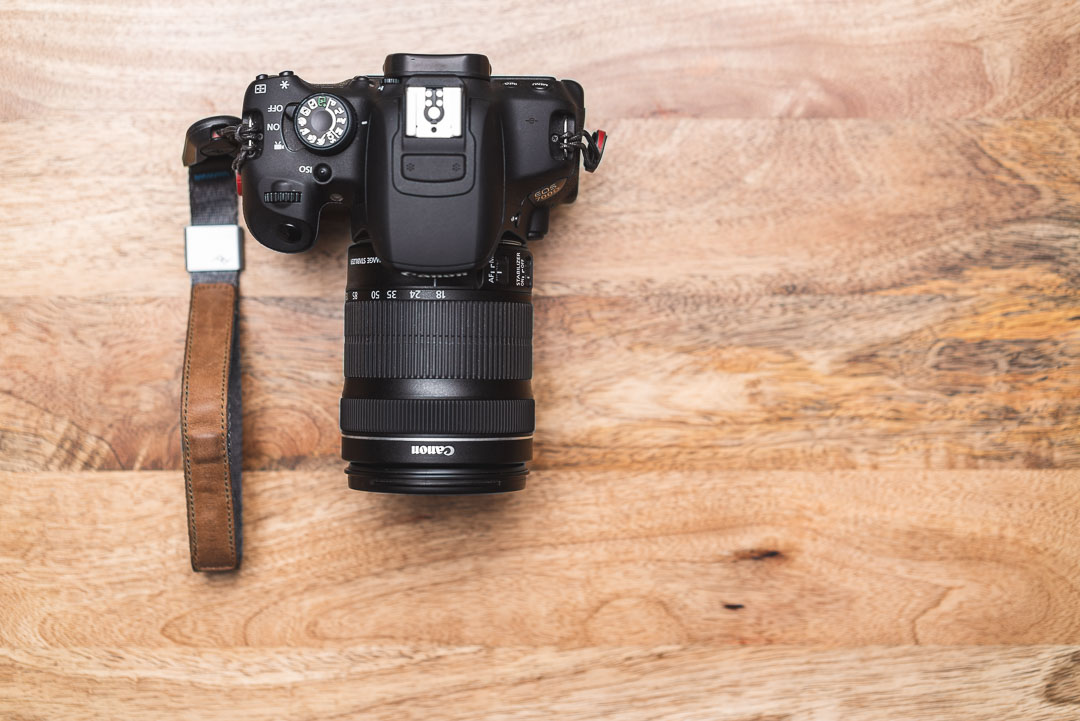
There are numerous similar APS-C DSLR camera kits available from Canon and other brands, and it really doesn’t matter which brand you prefer, but what made this kit so useful was having an all-in-one zoom lens.
The 18-135mm IS STM lens gave me a full-frame equivalent field of view of 28-216mm, perfect for pretty much anything the Galápagos could throw at me, and all in one package. Since we often found ourselves as close as 2 meters to certain wildlife, it meant that we didn’t always need a super telephoto to get some great-looking shots.
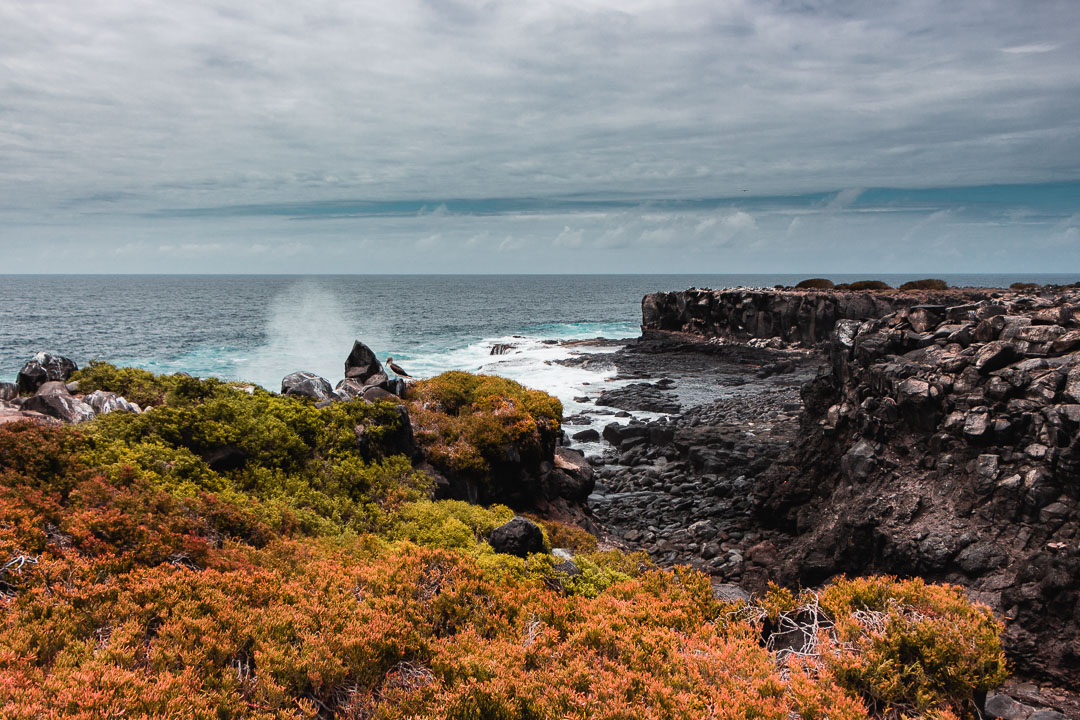
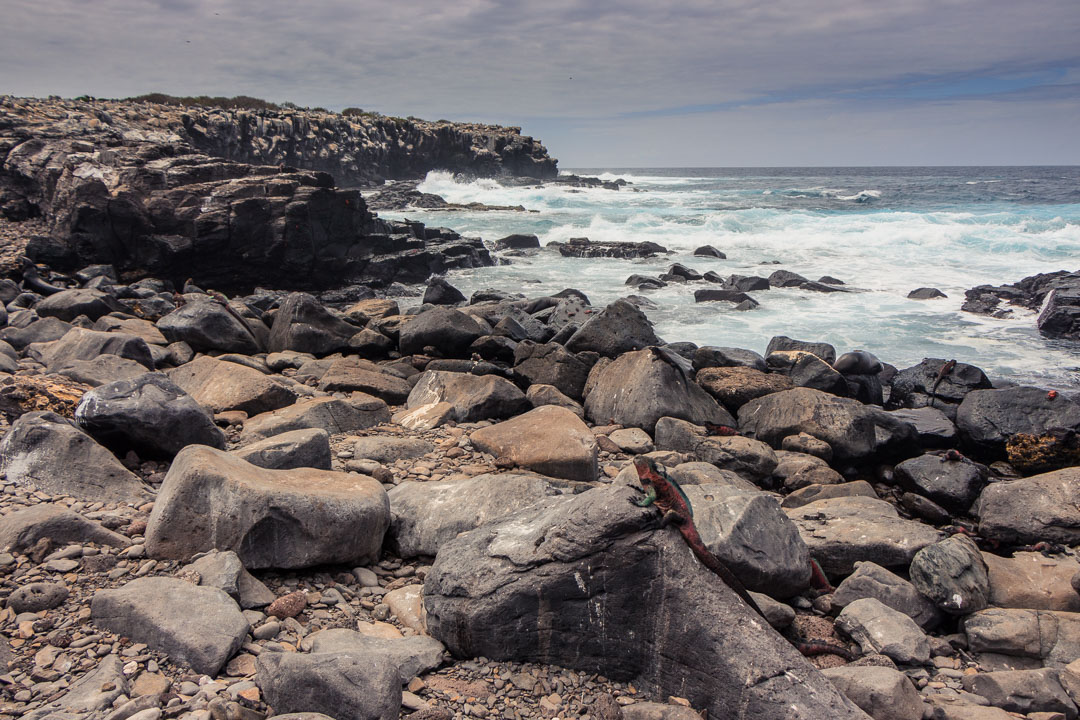
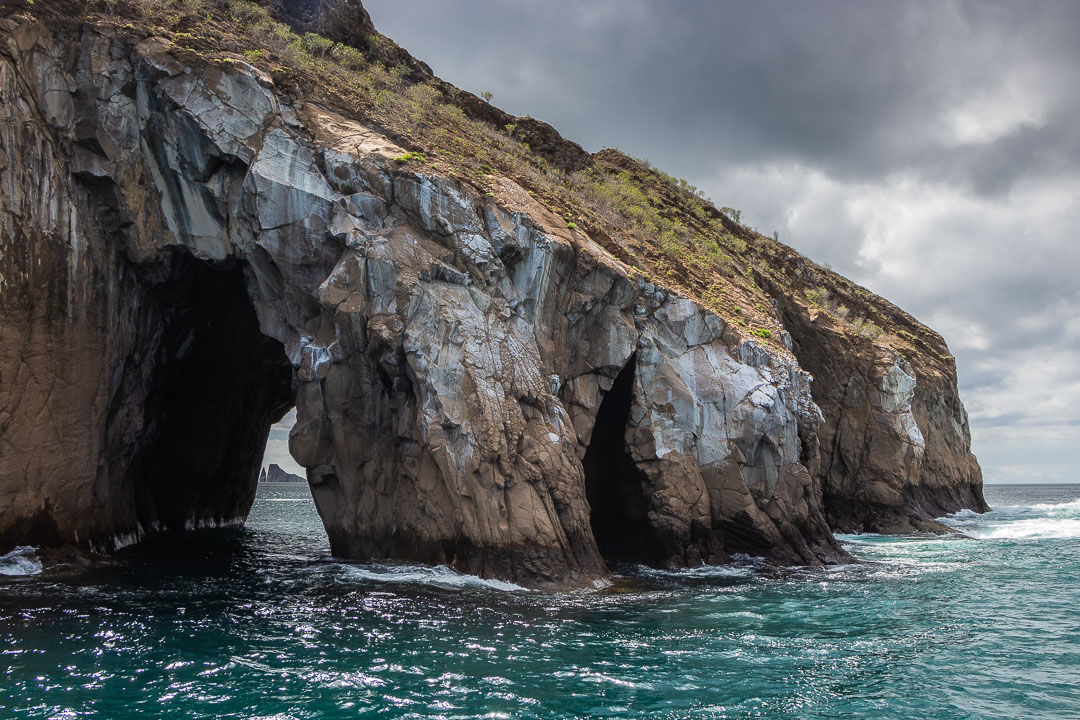
Also having the versatility to be able to zoom out to 18mm made it easy to capture wide views of the sometimes alien Galápagos landscapes.
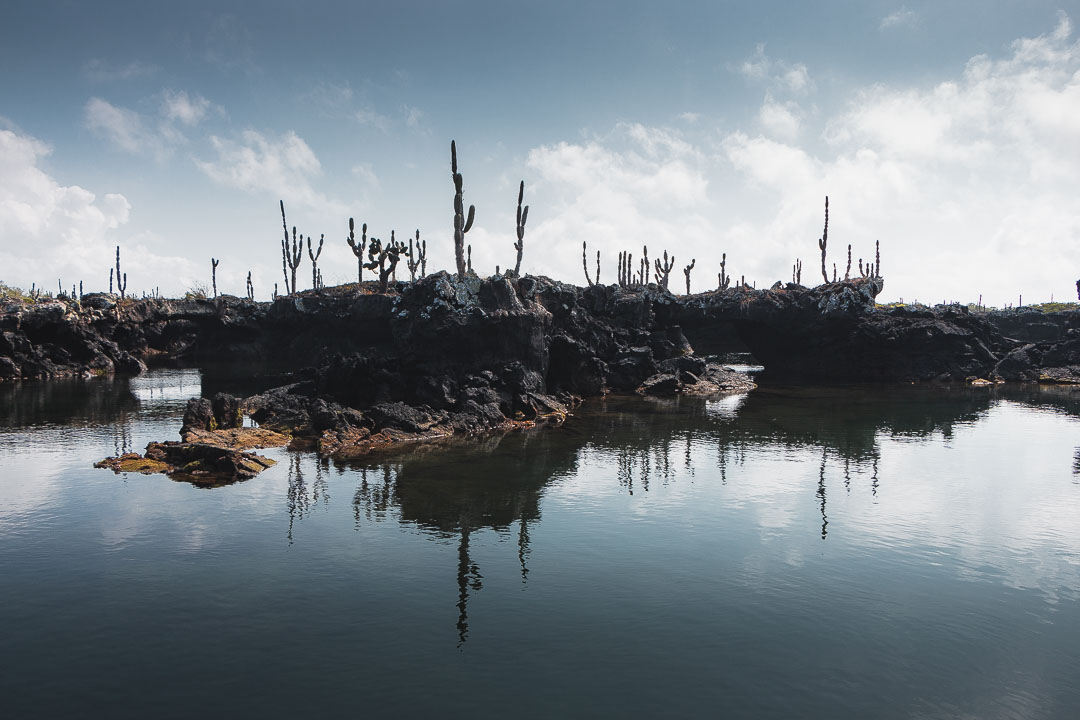
I usually found myself shooting at the extreme ends of the all-in-one lens. I tried to shoot a lot of landscapes at 18mm to remember what the whole scene looked like.
But then I’d be able to zoom in on some small detail that I could pick out of that scene, like this blue footed booby.
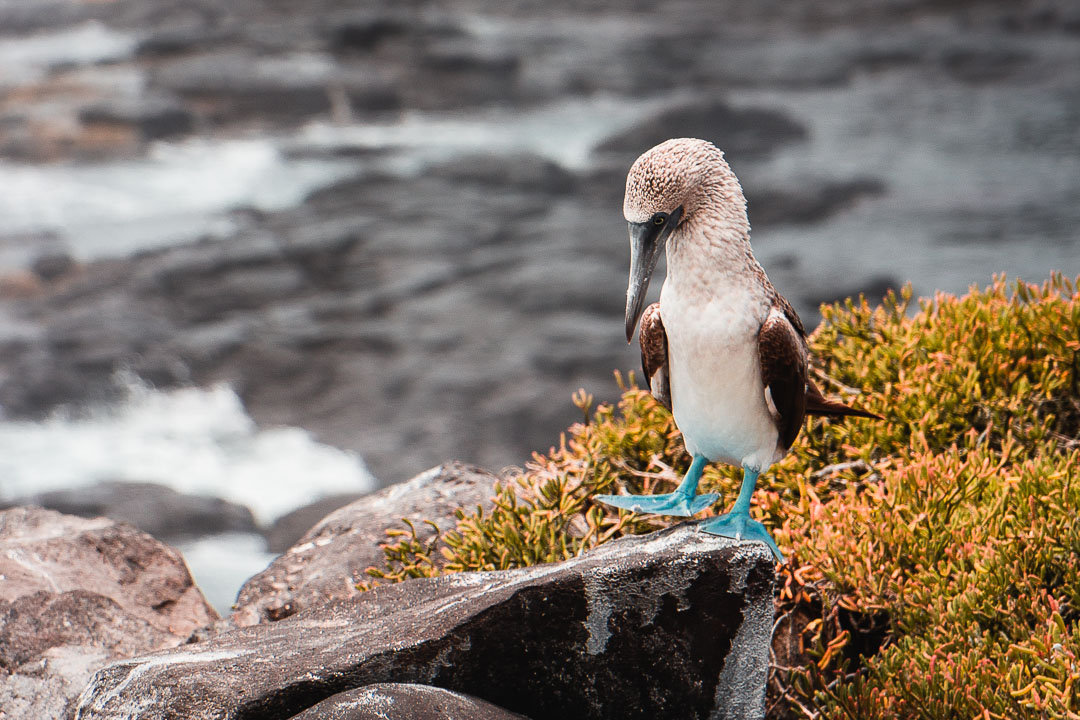
While it lacked the super telephoto reach of Diana’s Sony a7III kit, the max focal length of 135mm was adequately long for most of the Galápagos wildlife we encountered. I was often surprised by how much background separation I was able to achieve with such a cheap and simple kit. It certainly punched above its weight.
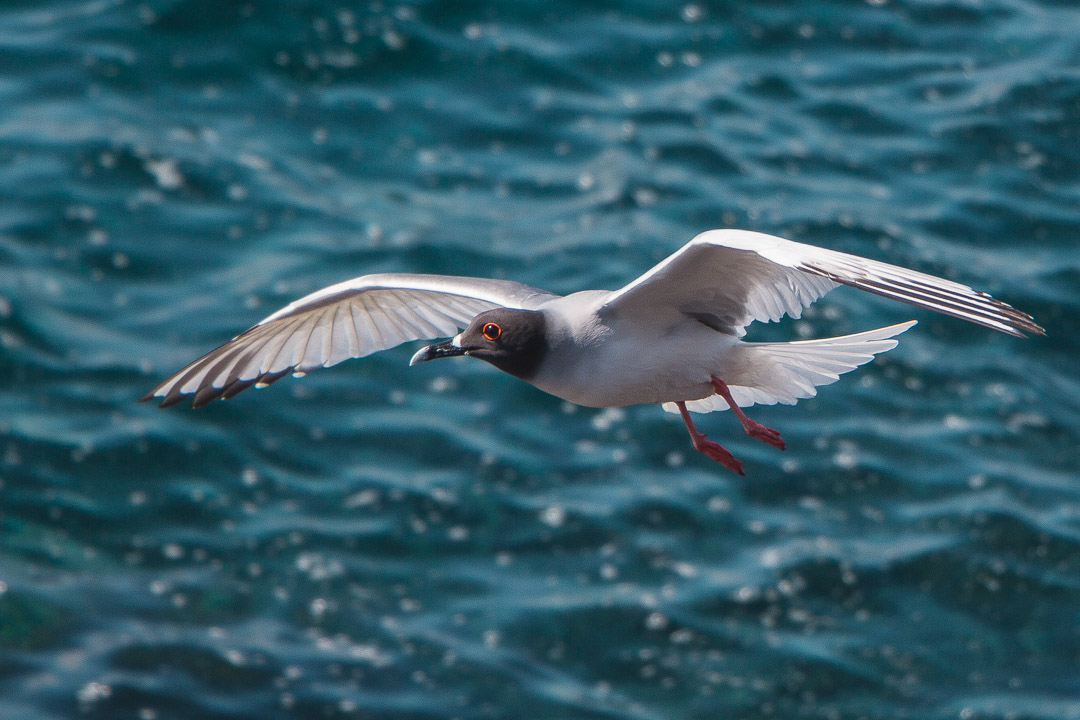
Autofocus speed and accuracy on this older model Canon EOS 700D wasn’t nearly as good as the Sony a7III, but it was adequate enough to still try some action shots of certain animals, even birds in flight. I was surprised to find a few of my attempts at capturing the birds flying around North Seymour Island were actually quite successful.
If you’re buying something new, there are many similar and newer DSLR options on the market, but if we were to re-approach our choice, we’d probably instead go for one of the more modern and more compact mirrorless options with an all-in-one zoom.
Rather than a traditional DSLR, more compact mirrorless cameras have some distinct advantages, such as on-sensor phase detection or “Dual-Pixel” autofocus and electronic viewfinders. New mirrorless cameras tend to be cheaper than DSLRs, too.
If you want to enjoy versatility on a smaller budget, then a cheap DSLR or mirrorless with an all-in-one zoom lens is your best choice for capturing your experience on the Islands. Here are our choices for a budget all-in-one zoom camera to take to the Galápagos:
- What we used: APS-C Canon T5i/700D + Canon 18-135mm IS STM lens
- New Mirrorless All-in-One Zoom Kits
- New DSLR All-in-One Zoom Kits
Ultracompact All-in-One Zoom: Sony RX100 VII
Sometimes convenience and compactness are more important than anything else. For our Galápagos trip, we kept all of our packing to one 26-liter backpack each. But with a couple full size cameras in there along with all of our clothes and gear for 12 days on the islands, we definitely wished at times that we’d packed something smaller like the Sony RX100 VII.
This is a great camera option that we would recommend for a variety of photography experience levels. It has full manual controls, which experienced photographers will appreciate, but it’s a much more approachable camera for a beginner to start using than the professional zoom setup that Diana traveled with. It’s more costly than the budget camera setup that I used, but some key features make the Sony RX100 VII better for wildlife photography.
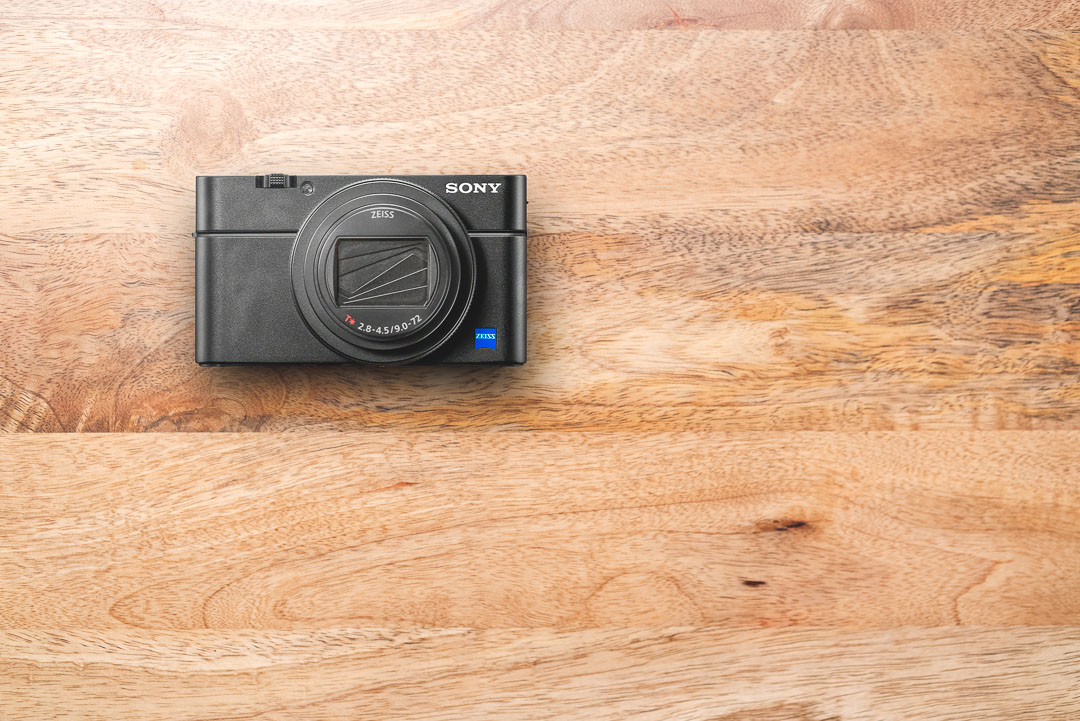
Our friend Dean Putney joined us with his new ultracompact RX100 VII on our Galápagos trip. We’ve previously owned the older generation RX100 III, and we loved it. The new Mark VII version is even more impressive. If you want to travel ultralight but still be able to capture amazing photos of all the wildlife in the Galápagos, the RX100 VII is what we’d bring.
This tiny point and shoot packs a huge zoom range equivalent of 24-200mm in a package that fits in your pocket. That’s plenty of reach for almost any wildlife you’d encounter in the Galápagos, and it also features an extremely fast and accurate autofocus system that’s very similar to the superior focusing system in Diana’s Sony a7III.
Because of the RX100 VII’s large 1″ sensor, it’s capable of shots that look like they were made on a much larger DSLR or mirrorless camera.
Furthermore, the RX100 VII can shoot even faster than the a7III at a whopping 20 frames per second, making it perfect for wildlife. Its lens is also fully optically stabilized, which ensures that zoomed-in photos and videos stay sharp. It shoots 4K ultra high definition video and can shoot slow motion video clips as fast as 1000 frames per second.
With these high-end features, the RX100 VII is almost like a Sony a9 (Sony’s professional wildlife and sports camera) that fits in a pocket.

If you want a no-compromise compact camera, the RX100 VII is our choice for a trip to the Galápagos. It’s simply the best ultralight compact zoom camera on the market today.
- Sony RX100 VII
- Sony PCK-LG1 Screen Protector
- Extra Sony NP-BX1/M8 Battery
- SanDisk Extreme Pro UHS-II 128GB SD Card
Essential Accessories
There are a few essential accessories that we brought with us to the Galápagos.

- Platypod Ultra + Sirui C-10 Ballhead
- Pedco Ultrapod II
- Giottos Rocket Blaster
- Anker 10,000 mAh Powercore II Slim USB Battery
Unless you’re booking private tours to record videos of wildlife, you probably don’t need a full-size tripod for the Galápagos Islands. If you want the best Galápagos experience, you will almost always be on your feet, walking around, very often on a guided tour. In these cases, you won’t really have time to set up a tripod shot, but we found that we rarely needed one anyway.
Platypod Ultra + Sirui C-10 Ballhead
Since we shot most of our photos handheld, we’re glad we brought some really tiny tripod solutions like the Platypod Ultra. The Platypod is a miniature camera “tripod” that allowed us to secure the Canon DSLR or Sony a7III to a variety of surfaces, either with its strap or upon spiked feet for low-to-the-ground shots. We paired it with the small Sirui C-10 Ballhead, which proved plenty stable for either of our full-sized cameras.

Pedco Ultrapod II
Essentially for the same purpose as the Platypod, we also packed a different kind of miniature tripod: the Pedco Ultrapod II. It’s a little bulkier and certainly less stable than the plate-like Platypod, but it’s much faster to set up than the Platypod and it functions more like a normal tripod. Both of them feature a velcro strap to be able to mount your camera to railings and posts.

If you only need one tiny travel tripod, consider either of these models. Get the Platypod if you want the most stable support, but if you want the easiest and fastest support to set up, get the Pedco Ultrapod II.
Giottos Rocket Blaster
We actually forgot to bring our Giottos Rocket Blaster on our Galápagos trip and we regret not having it. There’s always the possibility for getting dust on your DSLR or mirrorless camera sensor and a rocket blower is the fastest and least intrusive way to get rid of dust spots in the field. If you’re bringing an interchangeable lens camera, don’t make the mistake we did. Bring a rocket blaster.

Anker USB Battery
In order to charge our camera batteries, our GoPro, or even our smartphones, a simple Anker Battery ended up being essential for us. We used it every day to top off any number of devices while on the go. I kept it in my fanny pack for easy access during our excursions, and I topped it off each night in the Airbnb. The 10,000 mAh version ended up being plenty of juice for most days, but there was the occasional heavy use day when we wished for just a little more charge.

Closing Remarks
Depending on your photography goals, there are obviously many different approaches to choosing the right photo gear.
Just remember that seeing unique wildlife is core to the Galápagos experience, and having the right tools to capture that experience is the best way to preserve your memories of this amazing place.
We hope you enjoyed this complete overview of the camera gear we brought and recommend for visiting and photographing the Galápagos Islands. If you have any questions about recommendations on what to bring, let us know in the comments.
Disclosure
We are a participant in the B&H Affiliate Program which also allows us to earn fees by linking to bhphotovideo.com. We are a participant in the Amazon Services LLC Associates Program, an affiliate advertising program designed to provide a means for us to earn fees by linking to Amazon.com and affiliated sites.